POPS QuickPay
Use QuickPay to make a Patient Payment without the detail of the Full POPS Portal.
- To mirror the POPS Patient Experience, access QuickPay by using the POPS link in the Balance panel on the Patient Dashboard.
- QuickPay can be accessed by the Patient with their Computer or Mobile device using a URL, QR code, a link in a notification email/text or a link on your website.
- QuickPay defaults to the Pay screen.
- POPS QuickPay does not support Stored Cards.
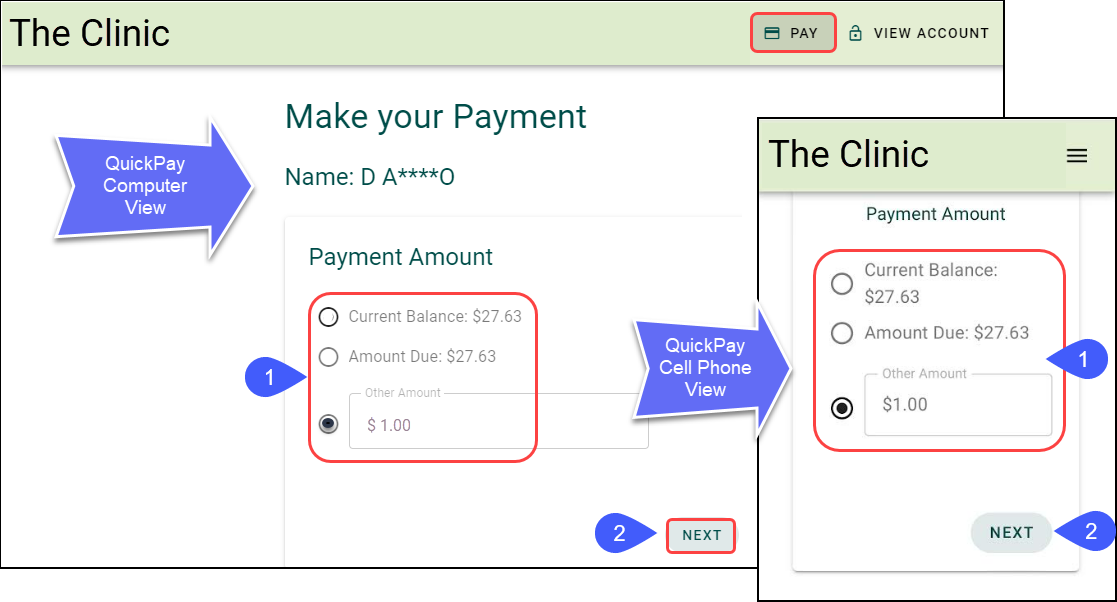
Make Your Payment
- Payment Amount: Select the radio button for one of the following:
- Current Balance: This is the Balance on the last Statement plus Patient balances after the Statement minus any Payments made on the last Statement.
- Amount Due: This is the amount that is due on the last Statement minus any Payments made since the last Statement and before the next Statement.
- Other Amount: Enter your own Amount.
- Select the Next button.
Apple Pay
- Apple Pay will only display as a Payment Method if:
- The office has set up Apple Pay in POPS Management.
- The User is on an IOS device, such as an iPhone or Mac, and is accessing the Portal from a Safari Browser.
- If split Payments to multiple Facilities or Providers has not been selected in POPS Management.
The screenshots show the process of making a payment on your cell phone.
- Follow the instructions to Make a Payment (Steps 1-2) and then select Apple Pay.
- Select Next.
- Select the
Pay button.
- Select the Payment Method.
- Double click your side button to Pay and follow the prompts to complete your payment.
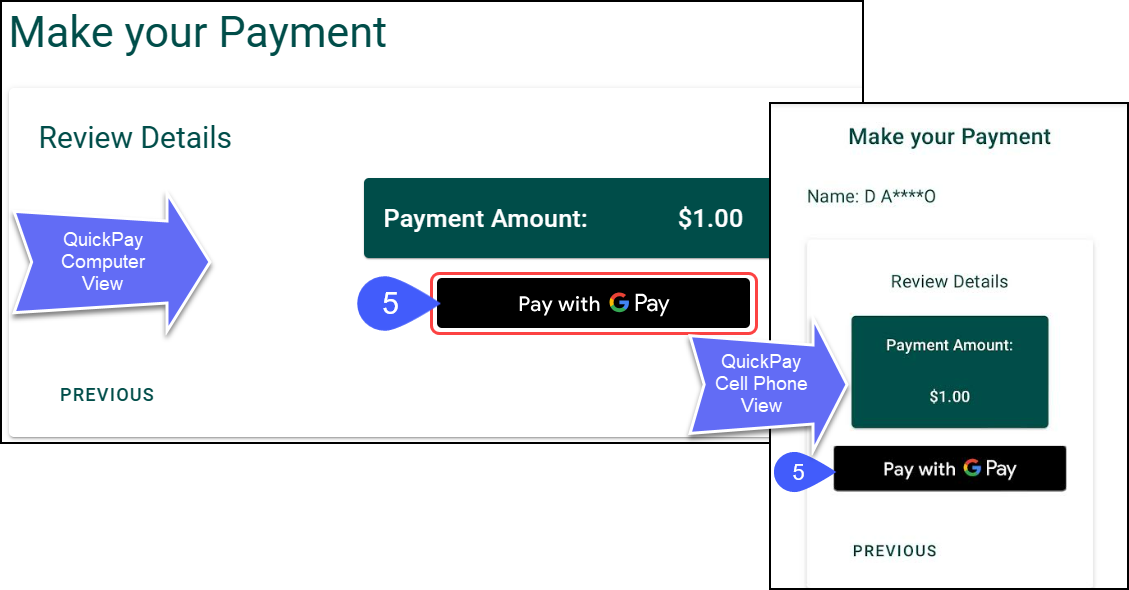
Google Pay
Follow the instructions to Make a Payment (Steps 1-2)
- Select Google Pay as the Payment Method.
- Select the Next button.

- Select the Pay with GPay button.
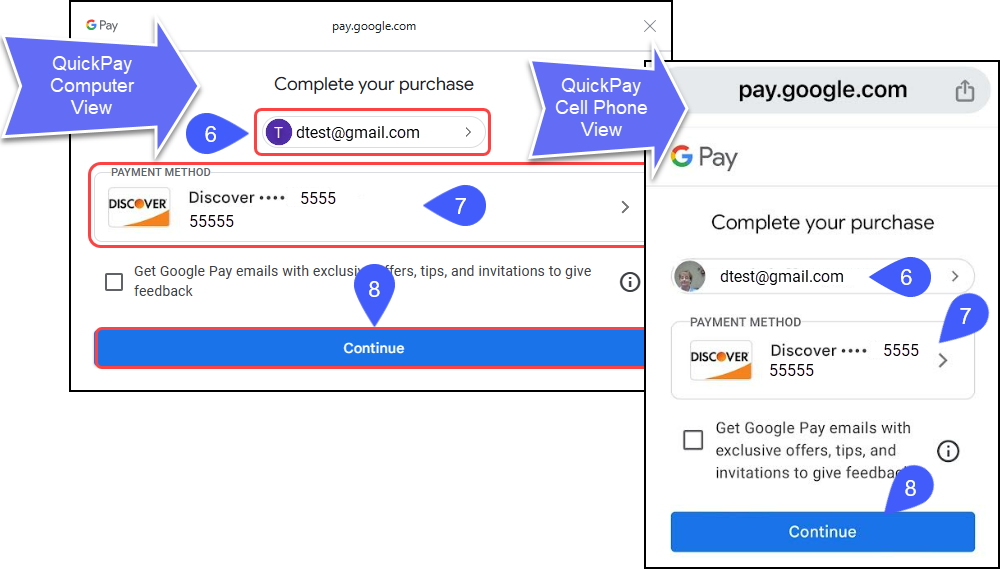
- Select the correct email.
- Select the Credit/Debit Card you want to use.
- Select Continue.
- After the Payment Method is chosen, select the Next button.
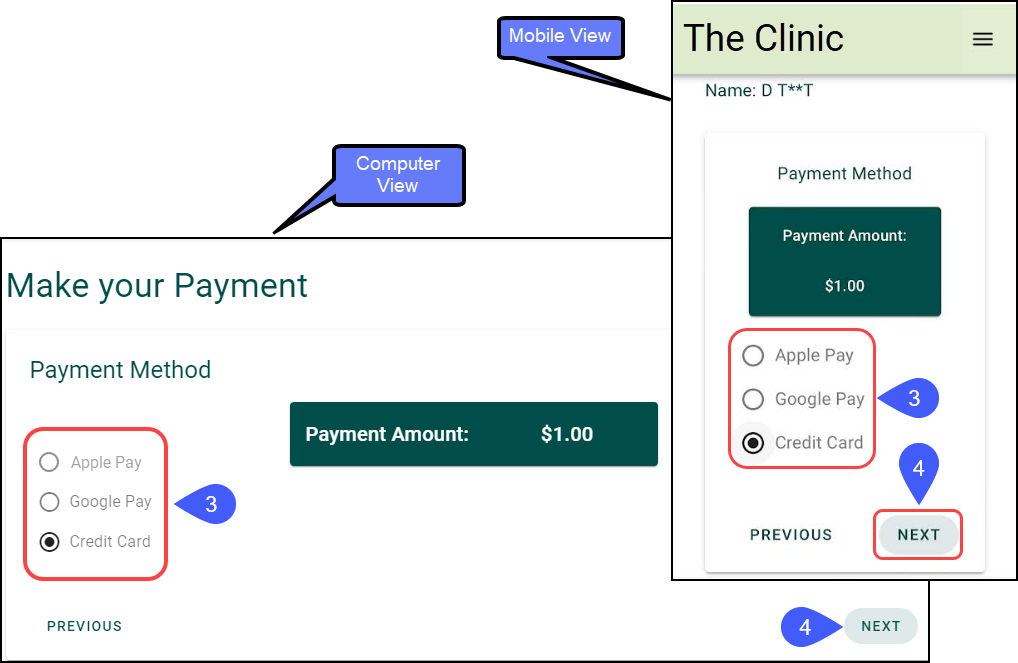
Credit Card Payment
- Select Credit Card for the Payment Method.
- Select Next.
- Enter the Credit Card information.
- Select Pay and follow the prompts.
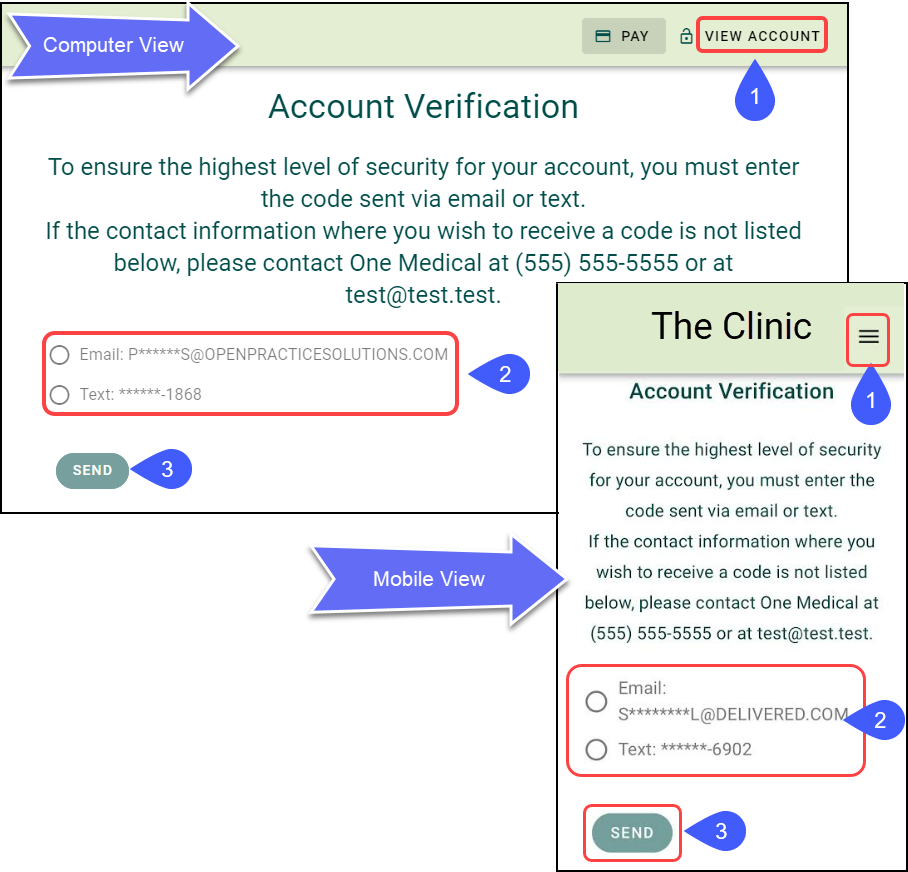
View Full POPS Portal from QuickPay on Your Computer and Mobile
- Select the View Account link if you are using your computer.
- If you are using your cell phone, select the 3 horizontal lines on the upper right.
- Select the method to Verify your Account.
- Select the Send button.
- Enter the numeric Code that is sent to you via email or text.
- If you did not receive a Code, select the Resend button.
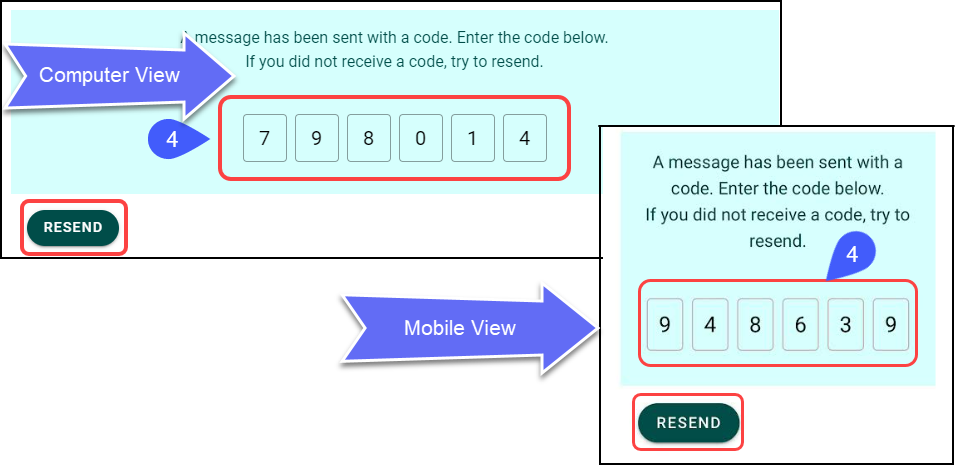
This will take you to the Full Portal screen.
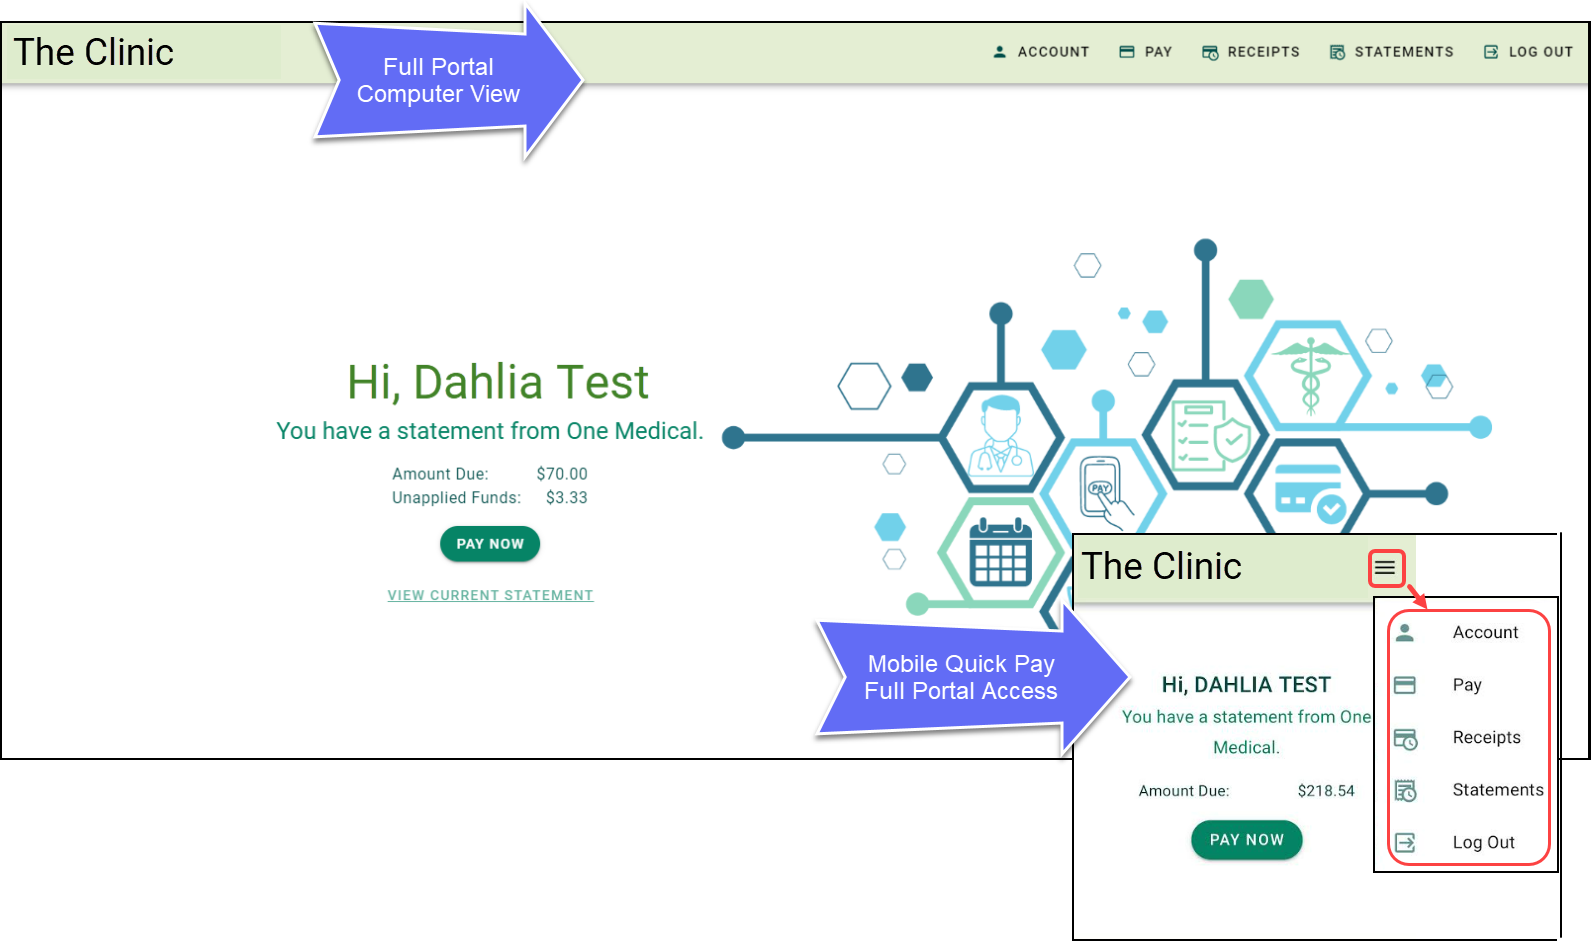
Mobile Full Portal View
Account
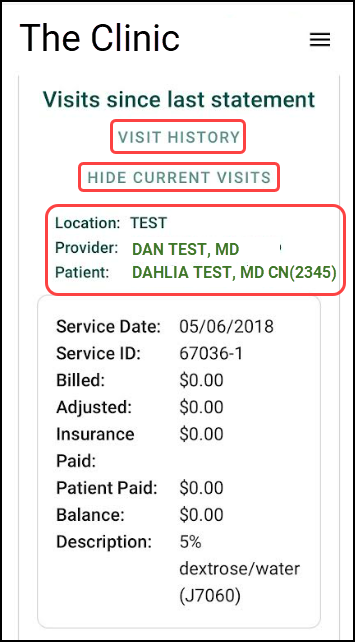
- Visit History: Select and use the filters to search.
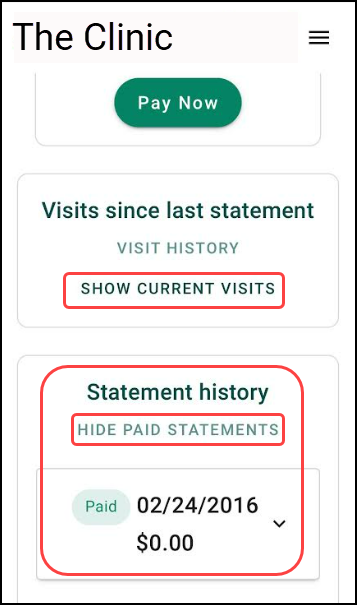
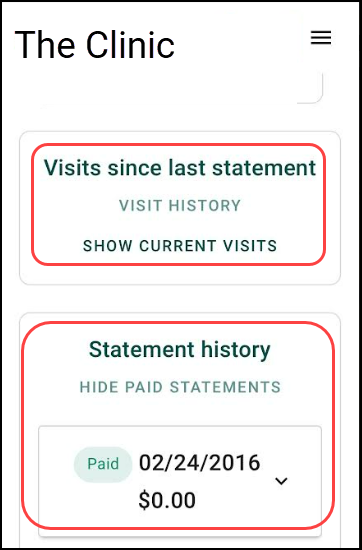
- Hide or Show Current Visits
- Statement History: Option to Hide or Show Paid Statements
Statements
- Visit History: Show or Hide Current Visits
- Statement History: Hide or Show Paid Statements
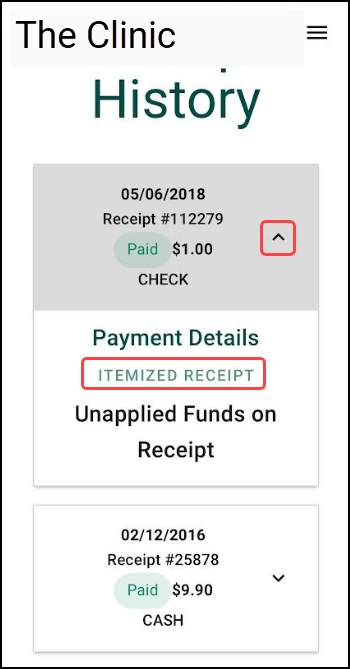
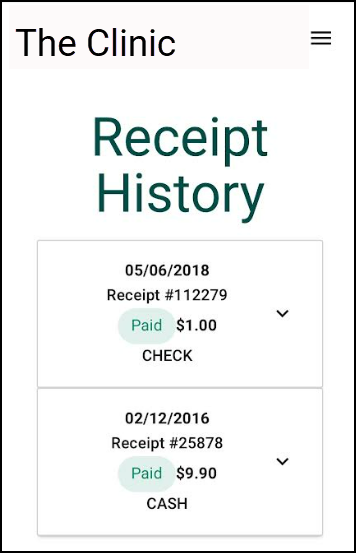
Receipts
- Receipt History: Itemized Receipts
Learn More
POPS Overview
POPS: Mirror the Patient Experience
POPS: Full Patient Portal
POPS Home Page
POPS Account
POPS Pay
Apple Pay
Google Pay
Credit Card Payment
POPS Receipts
POPS Statements
POPS Reports
POPS Payments Report
POPS Session Usage Report
POPS Setup
POPS Groups
Embed a POPS Link for your Website
Set Up a Custom Domain for POPS
Add POPS QuickPay Link to Email/Text Notification Templates
Related Articles
POPS: Full Portal Overview
Home Account Appointments Pay Receipts Statements Home The Home page is an overview of the POPS Portal, letting the Portal User know if they have a new Statement, an existing Balance, and provides the option to navigate to each additional POPS Page. ...POPS Session Usage Report
The Session Usage Report can be accessed from 2 places within the System: POPS Management Admin > POPS Management > Session Usage Reports Dashboard Reports > Session Usage Use Session Usage to Report on Patient activity within a POPS session. ...POPS Pay/QuickPay
POPS Payments A POPS Payment can be made in the Full Portal or using QuickPay from a link or QR Code. Select Pay or the Pay Now link in the Full Portal to navigate to the Make your Payment screen. In QuickPay, you will land on the Make your Payment ...Add POPS QuickPay Link to Email/Text Notification Templates
POPS Quickpay Links can be embedded into a text or email Balance Notification. Notification Templates can be managed in Statement Profiles. Admin > Statement Profiles Add a POPS Quickpay Link to an Email Template From Admin on the Left Side Menu, ...POPS Appointments
The POPS Appointments screen allows Patients and Guarantors to view their Past and Upcoming Appointments. Guarantors will be able to see the Appointments for all of their Patients or filter for a specific Patient. POPS Appointments Setup In the POPS ...