Add an Appointment
Prevent Creation of Simultaneous Appointments in the Same Slot
To prevent Users from creating Appointments in the same slot, the System displays this message: Warning? User XXX is also editing this slot.
Add an Appointment to the Calendar
- Select the time slot for your Appointment or use the Search tab to find available Appointments.
- The Date, Time, Facility and Resource default from the column and slot chosen on the Calendar.
- The Facility and Resource can be changed on-the-fly.
- The Date and Time are grayed out and cannot be changed on this screen.
- If the Date and Time need to be changed, exit this screen and choose the appropriate Slot.
- Patient Lookup: Methods to lookup the Patient
- Select the Lookup icon;
- Double click in the Patient field; or
- Use the Home key on your keyboard
- Select the Patient ID link.
- If the Patient is not found, select the Register Patient button to create a new Patient.
- Choose an Appointment Type.
- Duration will default to the time entered in setup but can be changed.
- Attached Procedures: Procedures can be attached to an Appointment Type and will appear here.
- Select the Attached Procedures link to Add, Delete, or Modify the Procedures.
- Taking Action on the Attached Procedures on the Appointment will affect the Calendar Appointment only and will not affect the Appointment Type in Scheduling Setup.
- Case: If a Case and/or Authorization needs to be added to the Appointment, select an Existing Case or Add a New Case from the dropdown list.
- This feature allows the User to affiliate specific Insurances, Accidents, Injuries, and other details for this Appointment.
- If the Case is marked as Default, it will auto-populate here and on the Charge Entry screen.
- Authorization: Defaults to the authorization on the Case chosen. An Authorization can also be added without a case for One-Time Authorizations.
- Modify link: An existing Case and/or Authorization can be modified.
- Referring: A Referring Provider can be attached to the Appointment using the Lookup icon. (Optional)
- Referral Reason: Enter a Referral Reason, if applicable. (Optional)
- Reason: An Appointment Reason can be entered. (Optional)
- Note: Applicable Notes can be entered. (Optional)
- You can opt to see the Reason and Note on the Patient's Appointment.
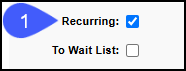
- Recurring: Select the checkbox to access the Recurring Appointment options.
- To Wait List: Select the checkbox to access the Wait List options.
- Save:
- Select Save (F2) to go back to the Calendar screen.
- Select Save/Manage to keep the Patient's Appointment screen open.
- Keeping the Patient's Appointment screen open allows you to use some of the other functions before going back to the Calendar, such as, check Eligibility.
Recurring Appointments
- Select the Recurring checkbox on the Add/Modify Appointment screen.
- Choose the Recurrence Options. Depending on the one you select, the fields below will change.
- Choose the Days of the Week if applicable.
- Choose the number of Appointments or an End by Date.
- Select Save [F2].

Learn More: Modify Recurring Appointments; Modify Recurrence Options; Cancel or Delete Recurring Appointments.
Appointment Screen Details
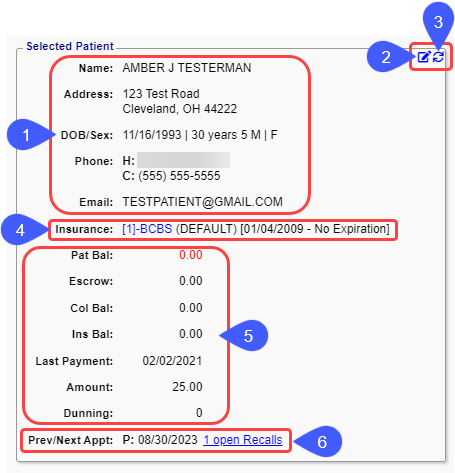
Right Side of the Add Appointment Screen
- Patient Demographics
- Modify Icon: Update Demographics and Insurance.
- Refresh Icon: Refresh your screen if changes have been made.
- Insurance Information
- Only the Default Profile Insurance shows on the Appointment screen.
- Active Insurance Profiles do not show.
- Use the Modify icon to navigate to the Patient Dashboard to change the Active Profile to Default.
- Balance and Payment Information
- Patient, Insurance, and Collection balances
- Last Payment, Paid Amount, and Dunning Count
- Displays the Previous/Next Appointment.
Links on the Top Right of the Add Appointment Screen
- Block Time: Changes the appointment to a Block Appointment.
- Reschedule Queue: Link to add a patient from the Reschedule Queue.
- From Wait List: Use to choose a patient from the Wait List.

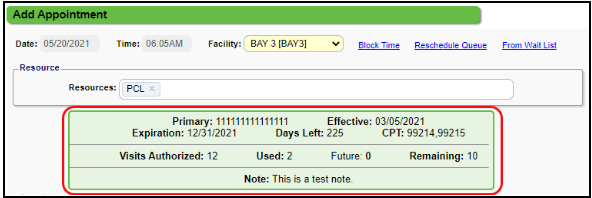
Authorization Countdown Panel
Example of the Eligibility Countdown panel.
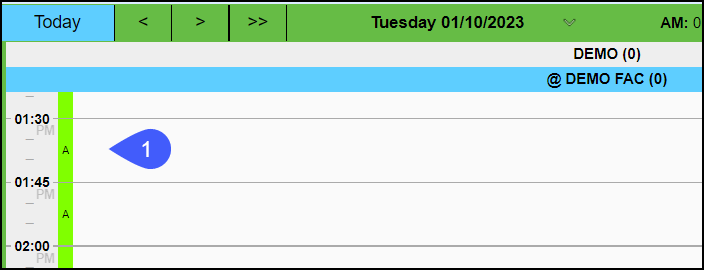
The Appointment Reason does not Display in the Appointment Slot
The Slots on the Calendar do not have enough space to show the Appointment Reason.
- If you want the Appointment Reason to show in the Slot, you will need to remove other items.
- The best way to see the Appointment Reason is by hovering over the Appointment on the Calendar.
Duplicate Appointment Validation
If you make a second Appointment on the same day, a Validation Warning will display when the screen is saved.
- Select the X on the upper right to leave the screen without making the duplicate Appointment.
- Select Save & Continue to make the Appointment anyway.
- Example: The Patient has an Appointment with the Physical Therapist and an Appointment with the Occupational Therapist on the same day.
- Select Save & Continue for this use case.
Add an Overnight Appointment
This is mostly used for Sleep Studies.
The ability to schedule an Overnight Appointment is controlled by a System Setting.
From Admin on the left side menu, select the System Settings button.
Category: Select Scheduling
ALLOWOVERNIGHT > Yes
Learn More
Search for Patient/Available Appointments
Patient Appointment Panel on the Patient Dashboard
Add a New Appointment during Check-Out
Patient Search Permissions by User/Resource
Eligibility Display on the Calendar
Modify an Appointment
Scheduling/Calendar FAQs
Add/Register a New Patient
Add a Case to an Appointment
Use Authorization without an Authorization Number
Add Cases and Authorizations
Appointment Wait List
Real-Time Eligibility Verification
Default and Active Insurance Profiles
Add Block Appointment Slots to the Calendar
Reschedule an Appointment/Reschedule Queue
Related Articles
Block Time on the Calendar
You may want to Block Time on-the-fly for a specific afternoon or for holidays to hold your schedule. The Block can be added to one or multiple Resources at once. Example: Add a Holiday for multiple Resources. Block Time Select the start time for the ...Scheduling/Calendar FAQs
Appointments How do I Register a Patient? Register a Patient How do I Schedule an Appointment? Schedule an Appointment How do I Modify an Appointment? Select: How do I Modify an Appointment? How do I see the Patient's Last Appointment? Select: How do ...Add an Authorization to a Case using Countdown
Use the Countdown on an Authorization When the Countdown fields are used, a message will be displayed when the Case/Authorization is used on the Scheduling Appointment screen and on the Post/Modify Encounter screen. The fields that are available for ...Group Appointments
Add, Modify, Reschedule Group Appointments Add Group Appointments Select the Slot for the Appointment. The Facility and Resource default from the Slot selected on the Calendar but can be changed on-the-fly. In the Appointment panel, select Group from ...Add Appointment Statuses
Add an Appointment Status From the Scheduling Dashboard, select Scheduling Setup. Select the Statuses tab. Select Add. Status ID. Enter a one or two digit ID. This field cannot be changed after the screen is saved. Enter a Description. Active: Leave ...