Pre-Payment Setup
Pre-Payment Setup
This is for groups who do not want to leave Pre-Payments in Escrow as unposted.
Example:
- Surgical Procedure will be performed where the Patient has all or partial responsibility.
- The office expects a Pre-Payment before the surgery that will be the Patient's Responsibility.
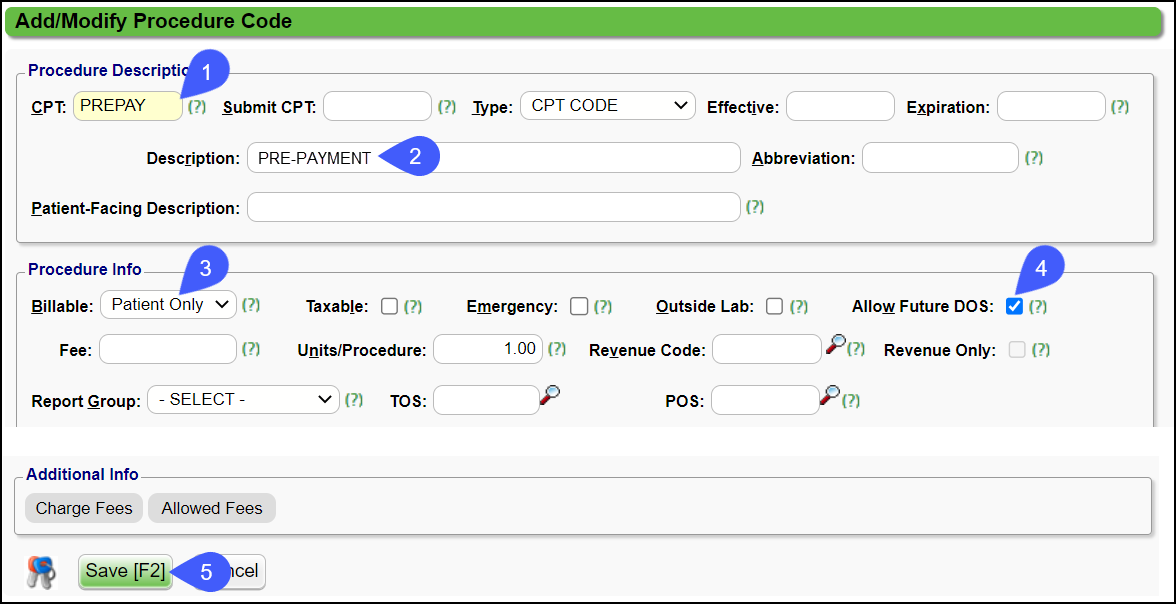
Create a CPT® Code in the Procedure Codes Library
- CPT®: PREPAY
- Description: PRE-PAYMENT
- Billable: Patient Only
- Allow Future DOS: Select the checkbox.
- Select Save [F2].
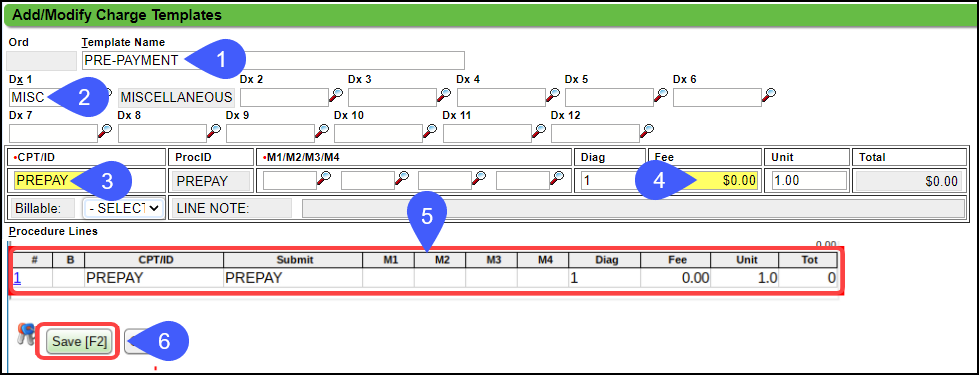
Create a Charge Template
- Template Name: PRE-PAYMENT
- Dx1: MISC
- CPT®: PREPAY
- Fee: 0.00
- Press Tab until the new Charge Template appears under Procedure Lines. If you do not tab through the fields, the Charge template will Save but the Procedure Line will not Save.
- Select Save [F2].
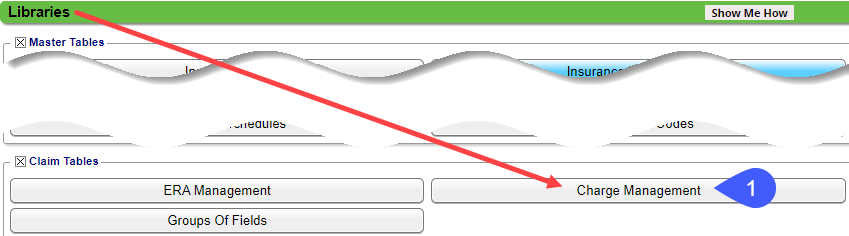
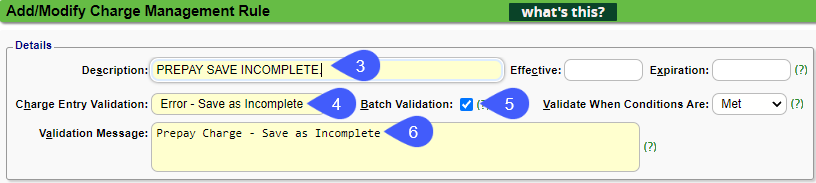
Create a Charge Management Rule
Create a Charge Management Rule to save the Pre-Payment Charge as Incomplete until the actual Charge is entered.
- From Libraries on the Left Side Menu, select the Charge Management button.
- Select the Add button.
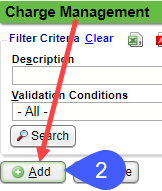
- Enter a Description: PrePay Save as Incomplete.
- Charge Entry Validation: Select Error - Save as Incomplete.
- Batch Validation: Select the checkbox.
- Validation Message: Prepay Charge - Save as Incomplete.
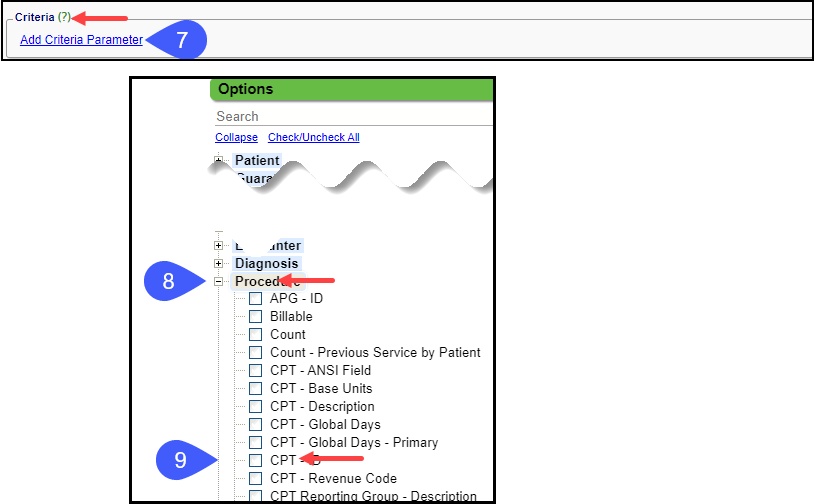
- Select the Add Criteria Parameter link.
- Find the Procedure section.
- Select the checkbox for CPT® - ID.
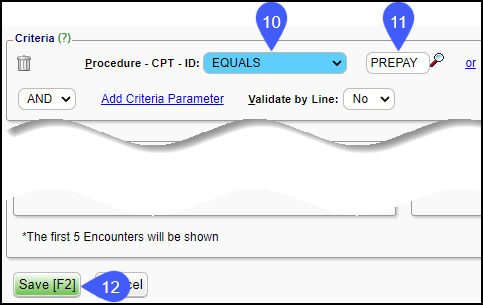
- Select EQUALS from the Procedure - CPT® - ID dropdown.
- Select or enter PREPAY in the next field.
- Select Save [F2].
Use a Worklist or Tags
To keep track of the Pre-Payments, you can use a Worklist or use a Tag on the Incomplete popup on the Charge Entry screen.
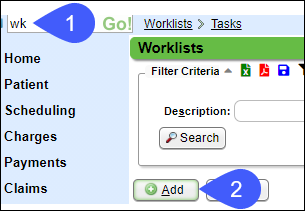
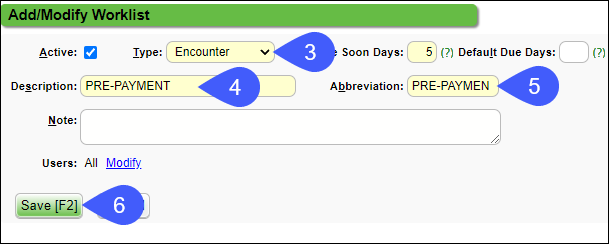
Create a Worklist for Pre-Payments
- Enter WK in the Navigation Search box.
- Select the Add button.
- Type: Select Encounter.
- Description: Enter PRE-PAYMENT.
- Abbreviation: Enter an Abbreviation.
- Select Save [F2].
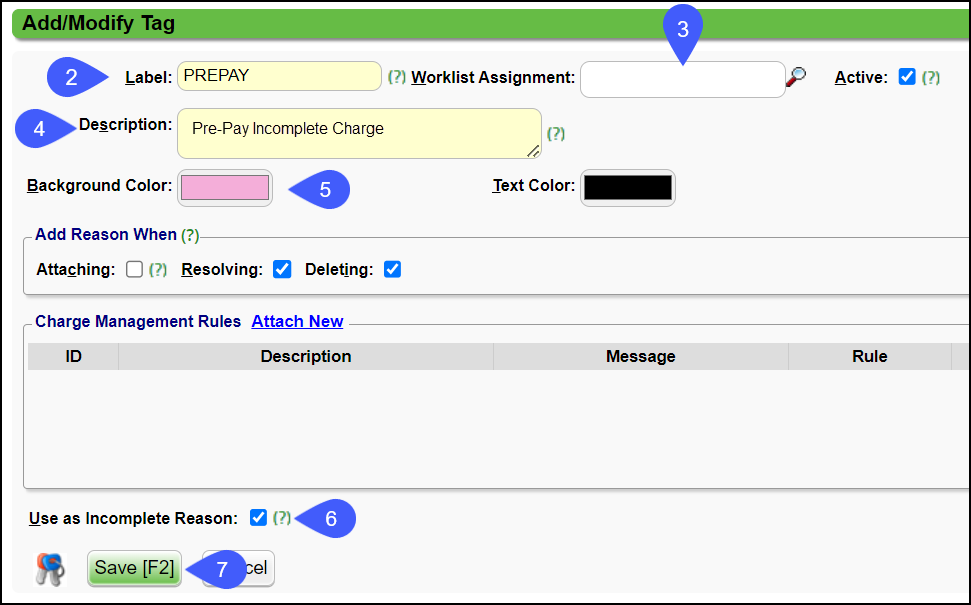
Create a Tag for Pre-Payments
- In the Tag Library, select the Add New Tag button.

- Enter a Label.
- Select a Worklist Assignment, if applicable.
- Enter a Description.
- Choose a Background Color.
- Select the checkbox for Use as Incomplete Reason.
- Select Save [F2].
Learn More
Post a Pre-Payment
Global Days
Add NDC Numbers (National Drug Code)
® CPT copyright 2019 American Medical Association. All rights reserved.
Related Articles
Post a Pre-Payment
Post a Pre-Payment to an Incomplete Charge This workflow is for groups who choose not to leave Receipts in Escrow for prepaid services. This process works well for paying Providers before services are rendered. Create an Incomplete Charge On the Post ...Payment Plans
If you are using one of our integrated Merchant Service vendors for credit card processing, Patient Payment Plans can be set up in the System. Payment Plans can be added from the Patient Dashboard, Payments Dashboard, Receipt Dashboard, or Guarantor ...Create a Patient Receipt/Post Payment Manually
Patient Receipt Creation If the Copay was not entered during the Check-in/Check-out workflow or if your Practice does not use the Calendar: Enter NR in the Navigation box (Go-Cuts) shortcut; Use the Post Payment link on the Patient Dashboard; Use the ...Invoice Profile Setup
In addition to Statement Profiles, a separate Profile is required for Invoices. Invoice System Settings These are some of the most important System Settings for Invoices. There may be others that you want to include as well. Admin > System Settings ...Statement/Invoice Profiles Setup
Statement/Invoice Profiles must be set up before Statements or Invoices can be batched. If the Statement Profile is selected as the Default, it will be attached to new Patients automatically. Other Statement/Invoice Profiles can be created to be used ...