Managing User Permissions/Roles

You will be prompted to enter your password when accessing or creating users.
User Permissions
Security Permissions are organized in a tree for the Administrator to allow access or block Users from screens and functions.
Individual User Permissions in User Maintenance
- Admin > User Maintenance
- Select the User.
- Enter your password.
- Select a Role.
- Select the Plus Icon beside System Permissions.
- Make changes for this User only.
- Select or Deselect checkboxes.
Permissions from the Admin Dashboard
- Admin Dashboard > select the Permissions button in the Security panel.
- Enter your Password.
- To change an Individual User, select the User radio button. (Default)
- Select the User from the dropdown.
- Use the Search field to find a specific Permission. (All functions containing the Search criteria will be highlighted in green.)
- OR select the Plus icon to expand each section.
- Changes made here will only be for the specific User that you have chosen.
Roles from the Admin Dashboard
- Admin Dashboard > select the Permissions button in the Security panel.
- Enter your Password if prompted.
- Select the Role Radio button.
- Select a Role from the dropdown.
- Make changes to the Role.
- If a User and the Role do not have the same Permission to a specific function, changing the Permissions on the Role will not update the User.
- In User Maintenance, the difference will be highlighted on the Permissions Tree.
- If the Permission for a specific function is the same on the User and the Role, changes will be reflected on both the Role and the Individual Permissions. See Example.
The Permissions settings allow you to give permissions (select a checkbox) or remove permissions (deselect a checkbox).
- User/Role: Select either User or Role to set Permissions for individual users or for everyone in a Role group.
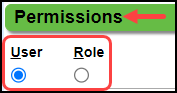
- Changes in Permissions on the Role will affect all Users with that Role if there are no differences between the Role and the Individual User Permissions.
- If the User and the Role do not have the same Permission to a specific category, changing the Permissions on the Role will not update the Individual Users Permission for that category. Learn More: Example for Changing Roles and Individual Permissions
- On the User's Permissions Tree, the difference between the Role Permissions and the User Permissions will be highlighted.
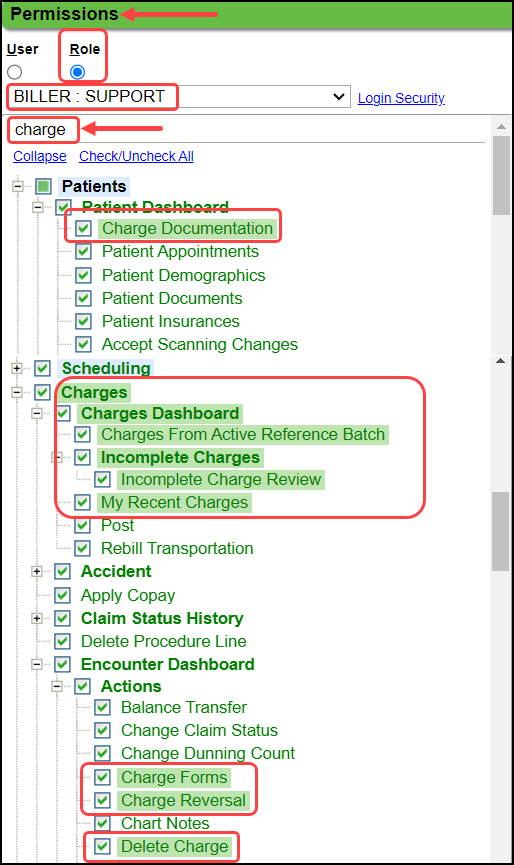
- Search: The search field allows you to narrow the Permission categories.
- Enter a word in the Search field to highlight the Permissions where that word appears.
- In the example, the radio button for Role was chosen and Biller for the actual role.
- Charge was entered in the Search field.
- Each highlighted line contains the word that you entered in the Search field.
- Permissions Categories: Permissions categories are grouped and can be expanded by selecting the Plus icon.
- In the following figure:
- The Categories with the plus icon are not expanded but are expandable by selecting the plus.
- The Categories with the minus icon are expanded and can be minimized by selecting the minus.
- The Categories with neither a plus or minus icon do not have the option to be expanded.
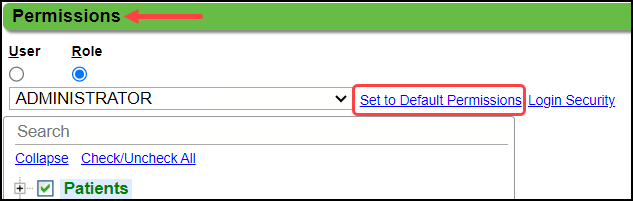
- Set to Default Permissions: If permissions have been changed at any point, the option Set to Default Permissions is available.
- This sets the Role back to the System Default Permissions.
- If this option is not available, no changes have been made to the Default Permissions for the Role.
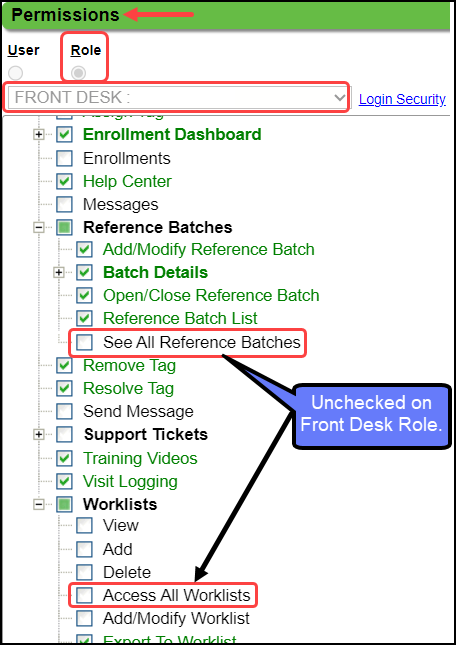
Example for Changing Roles and Individual Permissions
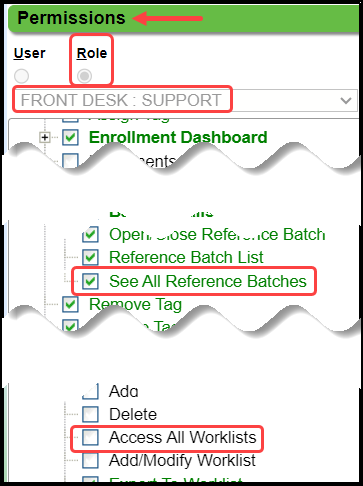
- The Front Desk Roles, Access to All Worklists and See All Reference Batches, unchecked.
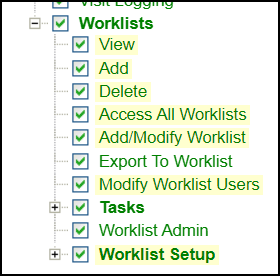
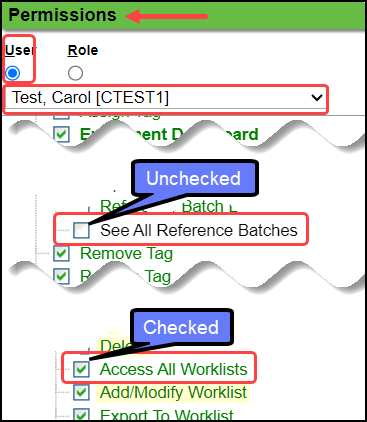
- Front Desk User, CTEST1, has Access to All Worklists checked, but See All Reference Batches is unchecked.
Change the Front Desk Role to include All Reference Batches
- On the Front Desk Role, check the box for See All Reference Batches and leave Access to All Worklists unchecked.
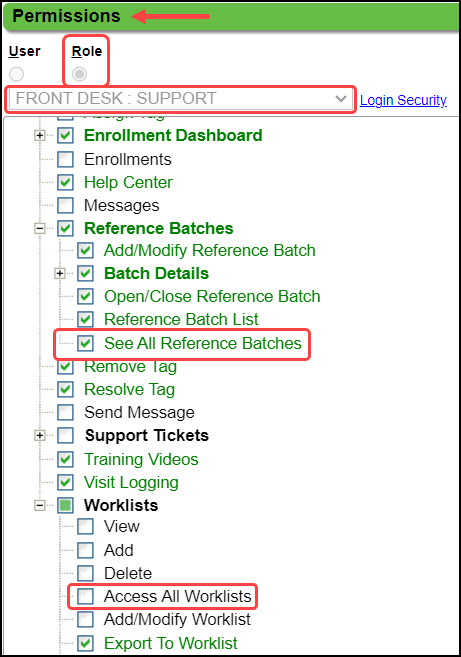
- The Front Desk User, CTEST1, will maintain Access to All Worklists plus will now have access to See All Reference Batches.
- All other Front Desk Users will not have Access to All Worklists but will have access to See All Reference Batches.