Voice Notifications Setup
 This is a Premium Add-On.
Voice Messages can be used as Patient Appointment, Balance and Payment Reminders. The Voice Messages are created in Statement Profiles in the Notifications panel.
Set Up a Voice Message
- Open the Statement Profile where you want to add the Voice Message. (Admin > Statement Profiles)
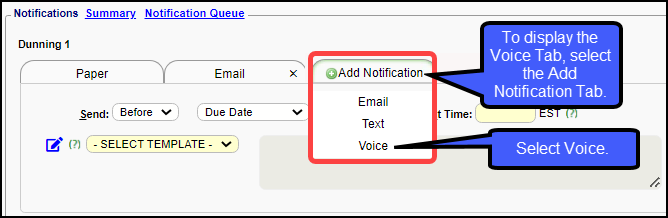
- In the Notifications panel, select the Notifications tab to
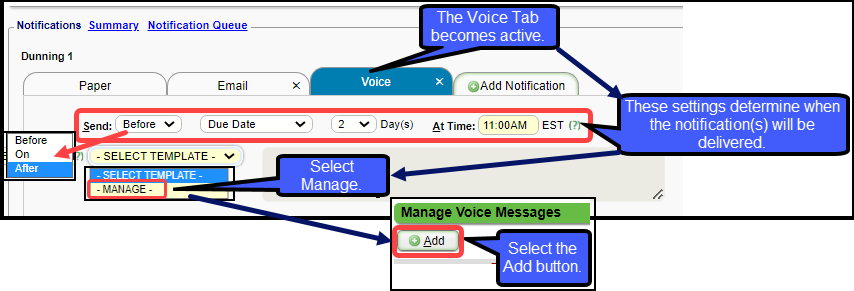
- On the Voice tab, set up the Send Rules which determine when the notification(s) will be delivered.
- Select from the dropdown, when to send the Notification in regards to the Due/Statement Date.
- Before
- On
- After the Due/Statement Date.
- Select Due Date or Statement Date.
- Days: How many days before the Due/Statement Date do you want the Notification sent?
- At Time: Enter the time that the Notifications should be sent.
- Select Template: Choose Manage.
- Select the Add button.
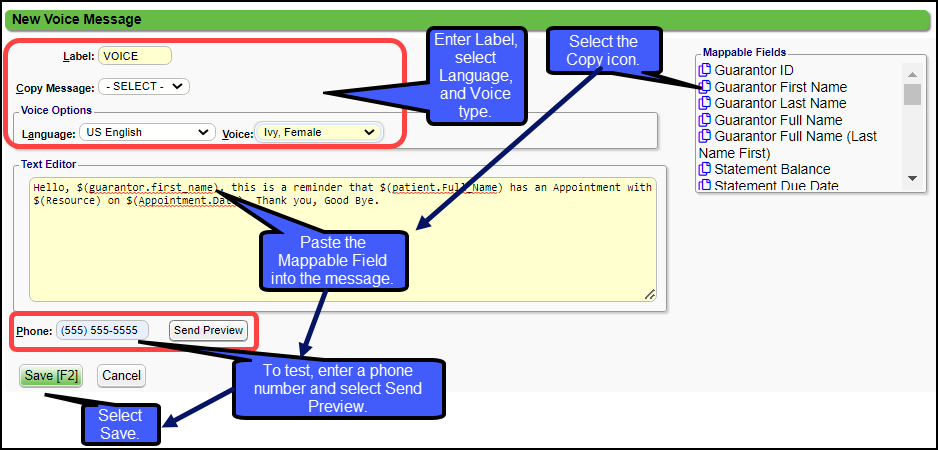
- Label: Create a label of your choice.
- Copy Message: Already created messages can be copied.
- Select the Language.
- Select which Voice that you prefer.
- Text Editor: Enter the Message that you want to be converted to Voice.
- To enter the Mappable Fields, select the Copy icon and then paste it into the Message.
- Paste by Ctrl V or right click and select paste.
- Phone: Enter a phone number to Preview the Message.
- Send Preview: Send to the phone number that was entered.
- If the message is satisfactory, select Save [F2].