Top Menu Calendar Navigation
Hide the Left Side Menu
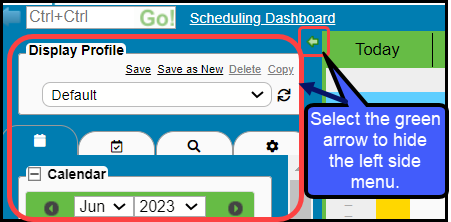
- To hide the left side Navigation panel, select the green arrow above the Display Profile.
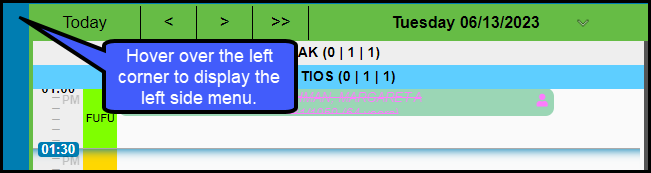
- To display after hiding, hover over the left side of the Scheduling Screen.
- To make the menu display all the time, hover over the left side of the Scheduling Screen and select the green arrow.
Video: How to Hide/Display side menu
Navigation Banner
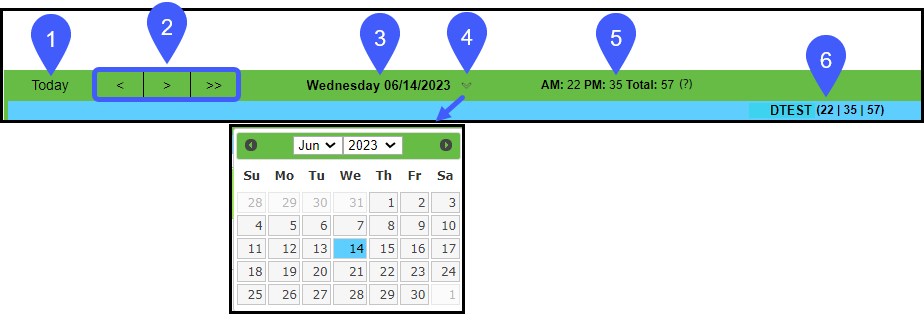
- Select Today to return to today's date.
- Arrows for Next and Previous: Day, Week, and Month depending on the view you are on.
- Single arrows go backward or forward a day, week, or month.
- Double arrows allow you to choose how far in the future you want to go in days, weeks, months, or years.
- Display of the Day and Date of the Calendar date selected on the Calendar.
- Select the down arrow beside the day and date to display another view of the Calendar.
- This Calendar has the same functions as the calendar on the left side of the Scheduling Tab.
- AM, PM, Total: Number of morning, afternoon and total appointments for the day.
- These stats are also shown parenthetically on the Daily and Weekly views next to the Resource and Facilities.
- Display of the Resource ID and the number of AM/PM/Total Appointments.
Select the View
- Day: Access the Daily view of the Calendar
- Week: Access a Weekly view of any chosen Resource tab, starting with the current day.
- Month: Monthly View displays Calendar for the month.

Month View
- Select a number on the Month Calendar to see Resource detail.
- If the Slot Types are defined in setup, the colors represent availability.
- Green: 0-33% booked
- Yellow: 34-66% booked
- Orange: 67-99% booked
- Red: 100% booked
- Appointment Counts are shown for the Resources that are selected on the Scheduling Tab on the Calendar.
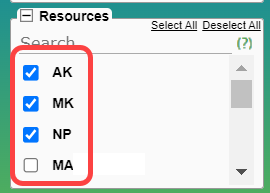
- Selecting a Resource on the Monthly view opens the Resource's Appointment screen.
- Select the Printer icon to print the Schedule view.
- This option prints the actual screen you are viewing.
- To print a list, use the Checked-In/Reports Tab on the left side panel.
