Delete or Modify a Receipt
Delete a Receipt Entered in Error
- Select the Receipt to be deleted.
- From the Receipt Dashboard, select the Delete button.
- Enter a Reason for deleting.
- Select the checkbox to confirm that this action cannot be undone.
- Select Submit.
The Delete Button is Grayed-Out
If the Delete button is grayed-out, you can hover over the Question Mark on the Delete button to see the reason why it cannot be deleted.
- Reasons it may be grayed-out:
- The Receipt contains transactions that are in a closed period.
- Undone Transactions exist.
- A Redo has to be done before the Receipt can be deleted.
Modify a Receipt
Receipts Fields that can be Modified
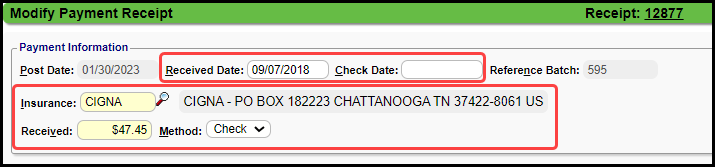
Payment Information Panel for Insurance Payments
- Received Date
- Check Date
- The Insurance can be changed for manually posted Payments if Payments have not been posted on the Receipt.
- Amount
- Method
Payment Information Panel for Patient Payments
- Received Date
- Check Date
- The Patient and Guarantor can be changed if:
- The Receipt is not in a closed period.
- There are no transactions, or all transactions have been undone.
- The Receipt is not reversed.
- Check, Card, and Copay Amounts
- The Total will update automatically based on the total amount entered in the other fields.
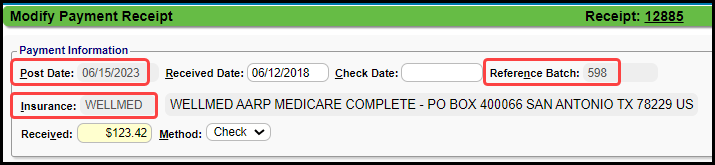
Receipt Fields that cannot be Modified
- Post Date: This date is controlled by the Reference Batch and cannot be changed on this screen.
- Reference Batch: Receipts can be moved to another Reference Batch, but the Batch number cannot be changed on this screen.
- Insurance Receipt for manually Posted Payments
- If even one Payment has been posted to the Receipt, the Insurance field will be grayed out and you will be unable to modify it.
- You can delete the Receipt and start over, but keep in mind that for a manually posted Receipt, all Payments entered on that Receipt will be deleted and will need to be re-entered.
Modify a Receipt after it is Saved
- Find the Receipt and select the Receipt Number.
- It can be found in the Reference Batch, on the Patient/Encounter Dashboard, or in Payments Dashboard.
- Select the Modify link on the Receipt Dashboard.
- Make the change.
- You must have permission in User Maintenance to perform this action.
- Select Save [F2].