Create a Spreadsheet to Upload to a Collection Agency
To create a spreadsheet to upload to a Collection Agency, you have two options:
Option 1
This option is best when Encounters are turned over to Collections individually from the Encounter Dashboard.
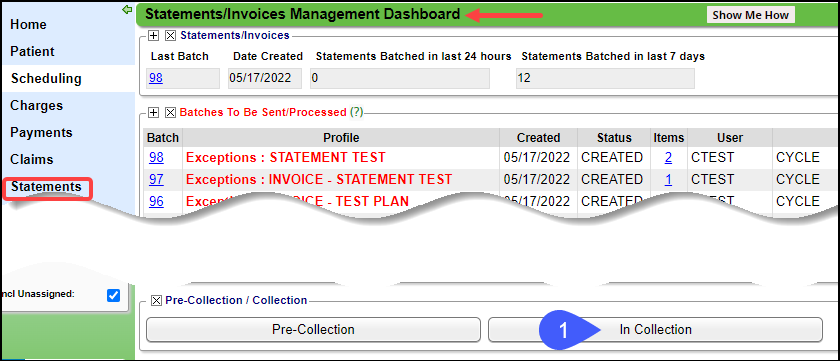
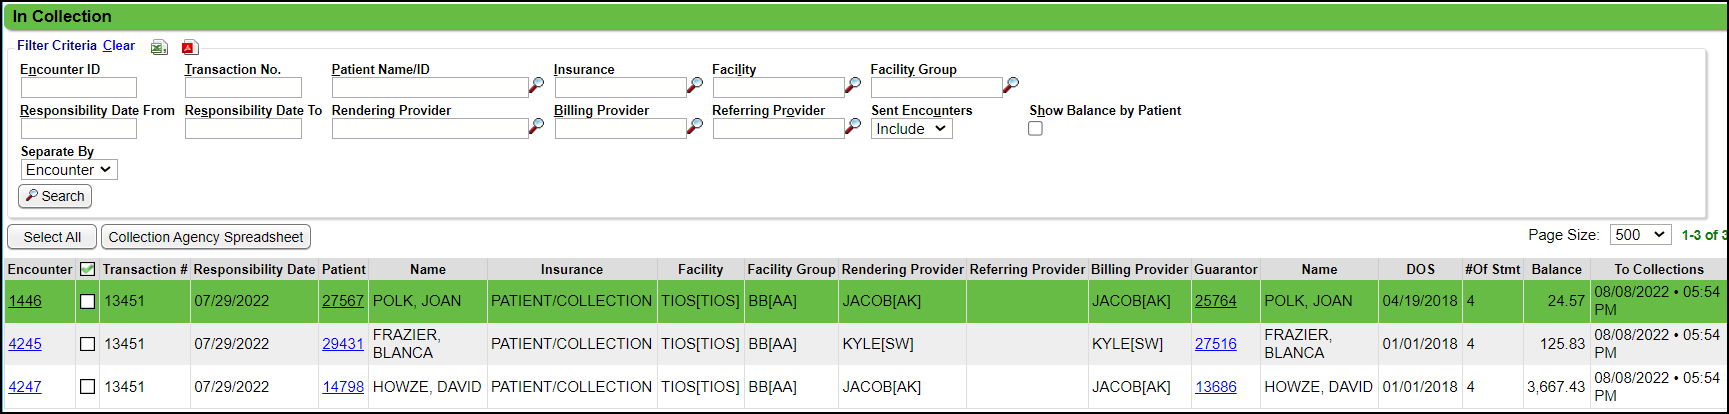
- From Statements, click In Collection.
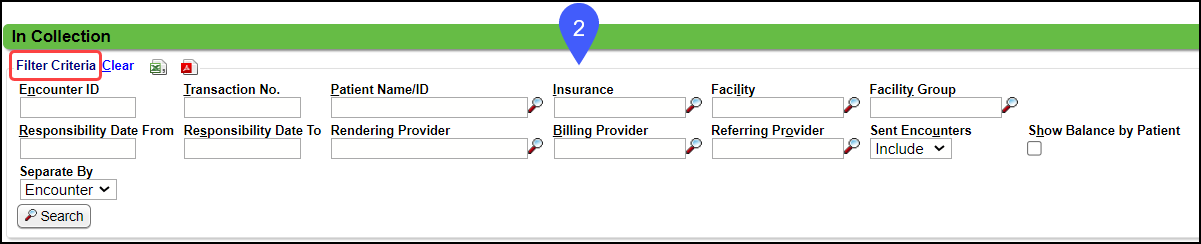
- Use the Filter Criteria to narrow your search.
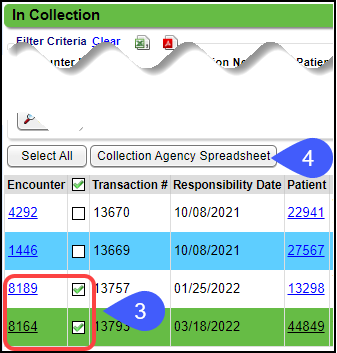
- Select the individual Encounters to be sent or choose Select All.
- Select Collection Agency Spreadsheet.
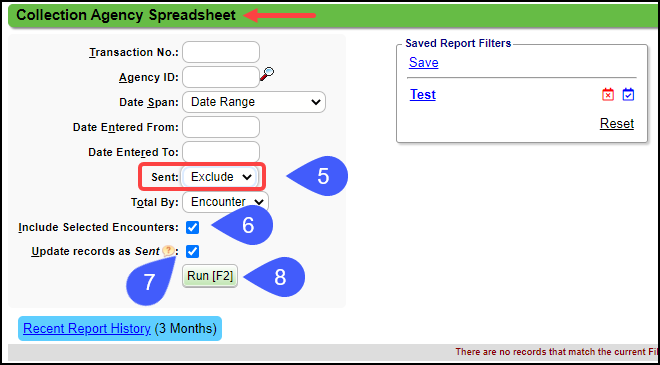
- Sent: Exclude
- Select the Include Selected Encounters. This is required unless a Transaction No. is used.
- Select the Update Records as Sent checkboxes.
- Click Run [F2].
Option 2
This option is best when Encounters are sent to Collections as a group from Pre-Collections. All Encounters will be assigned the same Transaction number.
- From Statements, click in Collection.
- Select Collection Agency Spreadsheet.
- Enter the Transaction Number.
- Sent: Exclude
- Select the Update records as Sent checkbox.
- Select Run [F2].
Update Records as Sent
When you select Update Records as Sent and run the Collections Agency Spreadsheet, the To Collections column updates to display the date and time that the Collection Agency Spreadsheet was created.
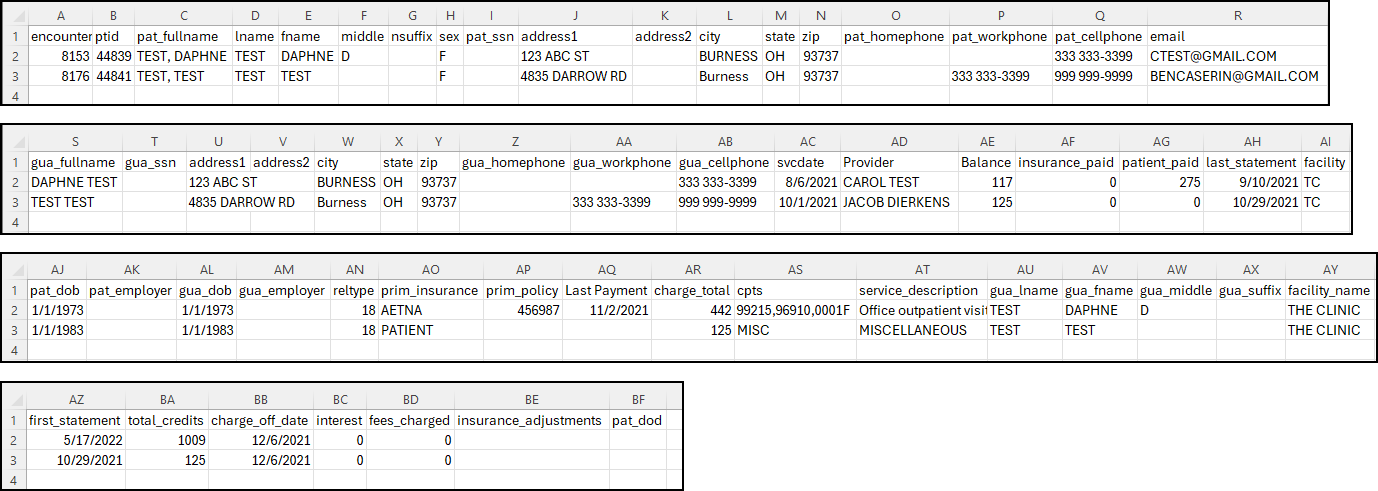
View the Collection Agency Spreadsheet
The spreadsheet contains all the information that the Collection Agency will need to collect from the Guarantor.
- Select this link to view the Collection Agency Report
- Add Encounter Custom Fields as columns on the Spreadsheet using the System Setting: COLLECTIONSCUSTOMFIELDS
Columns on the Spreadsheet
Learn More
Collections/Pre-Collections Overview
Add a Collection Agency
Pre-Collections Worklist
Make a Pre-Collections List
Reset the Dunning Count from the Pre-Collections Worklist
Delete Encounters from the Pre-Collections Worklist
Place an Encounter in Collections
Remove an Encounter from Collections
Collection Payments
Related Articles
Add a Collection Agency
Add a Collection Agency You must add a Collection Agency before working your Pre-Collections and Collections Lists. On the Libraries Dashboard, select the Insurances button. Select the Add Insurance button. For Type, select Collection Agency (CA) ...Collection Payments
Collection Agency Setup The Collection Agency should be set up in the Insurance Library. Learn more: Pre-Collection/Collections. Post a Collection Agency Payment Create one receipt for the Collection Agency Payment. Even if it contains multiple ...Create Forms
Create Forms A form can be a superbill, face sheet, or any other form. You can create and maintain additional forms by purchasing and using a PDF Creator tool. We recommend using Fox It PDF Editor Pro, but any software that allows you to edit or ...Manually Batch and Upload Invoices for Employers
Invoices are most commonly used for billing Employers or Attorneys. Invoices can be manually batched or an Invoice on Demand can be created. A batch of Invoices or a single Invoice can be manually uploaded to the Clearinghouse. The Job Scheduler can ...Upload Forms
Upload Forms After a Form has been created outside of the PM, it can be uploaded to the System. From Libraries on the Left Side Menu, select Forms in the Parent Tables panel. Select Add. Form Panel (All Forms) Form Type: Determine where this form ...