Create a Patient Receipt/Post Payment Manually
Patient Receipt Creation
If the Copay was not entered during the Check-in/Check-out workflow or if your Practice does not use the Calendar:
- Enter NR in the Navigation box (Go-Cuts) shortcut;
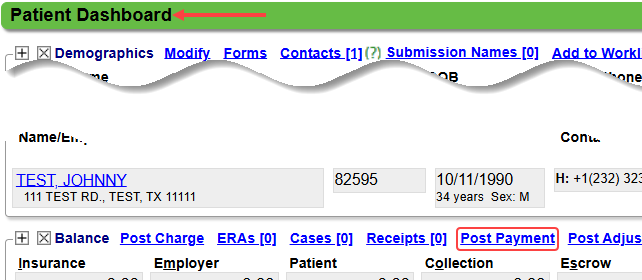
- Use the Post Payment link on the Patient Dashboard;
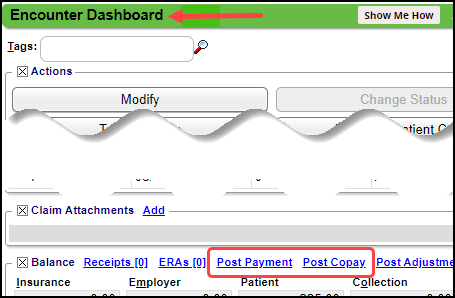
- Use the Post Payment or the Post Copay on the Encounter Dashboard; or
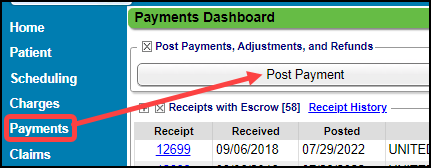
- From Payments on the Left Side Menu, select the Post Payment button.
- On the Modify Charge Screen, select the Copay button in the Procedure panel.
Create a Patient Receipt
Choose one of the Methods above to use for creation of the Receipt.
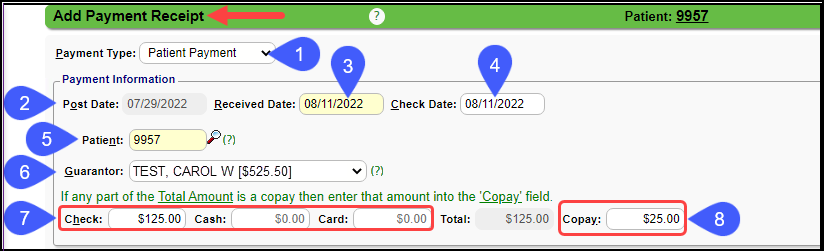
- Payment Type: Choose Patient Payment. (creates a PP Transaction Code)
- Post Date: Defaults from the Reference Batch.
- If this is blank, you are not attached to a Reference Batch.
- Connect to a Reference Batch before continuing.
- Enter the Receipt Date (Mandatory).
- Check Date is optional.
- Patient: If the Patient does not populate, use the lookup to find the Patient by selecting the Search icon or by entering the Patient ID or Guarantor ID.
- Guarantor: Defaults from Patient but can be changed.
- Enter the total amount paid in the appropriate field: Check, Cash, or Card.
- If a patient pays using multiple methods which includes a Credit Card Payment, create two receipts.
- Example: The Patient pays $20 in cash and $35 on a credit card.
- Create a Receipt for the $20 in Cash
- Create a separate Receipt for the $35 on the Credit Card.
- If this is a Copay, enter the amount in the Copay field.
- If part of the Payment is a Copay and the rest of the payment is on the account, only enter the Copay amount in the Copay field.
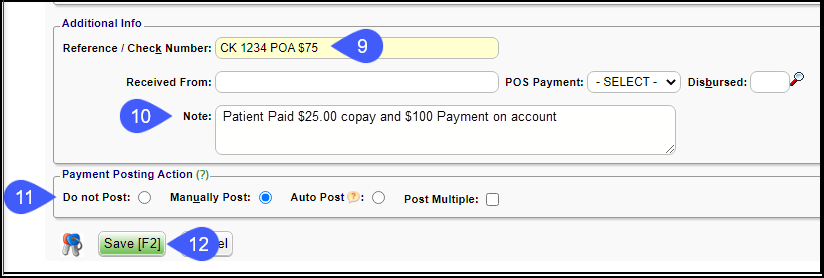
- Reference/Check Number: This field can be used for check numbers or other information that you want to see in the Reference Column when viewing the Reference Batch Items.
- Received From: POS Payment (Point of Service), and Note are optional fields.
- In the Payment Posting Action panel, select the posting method.
- Use Do not Post when:
- You want to create a receipt without posting, leaving the money in Escrow.
- You want to post this money later, leaving the money in Escrow.
- You want to use the Post [Expert Mode] option.
- Use Manually Post when you want to post the Receipt manually.
- Use Auto Post when posting a payment on an account.
- Money will be applied by default to the oldest Dates of Service (DOS) first that have a Patient balance.
- Use Post Multiple when you want to proceed directly to a new Receipt after saving.
- Select Save [F2].
Manually Post the Patient Payment
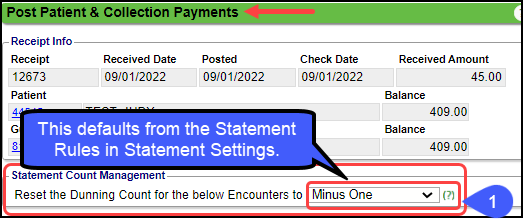
If Manually Post was chosen, the Post Patient & Collection Payments screen will display:
- Reset the Dunning Count for the below Encounters to: This field defaults to the value that was chosen in the Payment Rules panel in Statement Settings, but can be changed manually. This determines the Dunning Message that will be on the next Statement.
- In the Example below, the Dunning Count defaulted to Minus One.
- The Dunning Count was 1 before posting this Payment. Minus One will set the Dunning Count to Zero. (1 minus 1 = 0).
- In the Payment Application panel, select the plus icon (+) to expand the panel and filter for the Encounters you want to see. (Not Mandatory)
- Show: From the Show dropdown list choose an option.
- Services with Balance: Patient Balances (Chosen for this example)
- Services with Collection Balance Only: Shows balances that have been sent to collections.
- All Services: All Encounters regardless of balance.
- Include Additional Patients Under Same Guarantor: Select the checkbox to include all Patients with this Guarantor.
- Used frequently with Pediatric Practices.
- Method: Choose a Method from the dropdown list.
- Apply Manually: (Default) Allows you to manually choose the Encounters to post the receipt by selecting the checkboxes on the Encounter line items. (Used in this example)
- Apply Oldest Balances First: Distributes the receipt from the oldest Encounter to the newest Encounter with a patient balance.
- Apply Smallest Charges First: Distributes the receipt to the smallest amounts first regardless of the Date of Service (DOS) on Encounters where there is a patient balance.
- Uncheck All: Deselects all Encounters where there is a check mark.
- Total Escrow: A smiley face will display next to Total Escrow when the receipt has been posted in full.
- Select the check boxes manually on the Encounter line to apply the Escrow.
- If you choose a different Method, the list will show how the System allocated the Receipt.
- When all of the Escrow has been allocated, the yellow highlighted amount will change to 0.00 with a Smiley Face.
- When finished posting, select Save [F2].
Post a Collection Payment
Post a Collection Payment made in the Office
Post a Collection Payment from the Collection Agency
Learn More
Auto-Post
Pre-Payment Setup
Add the Guarantor to a Receipt
Force Apply a Patient Payment (Over Payment)
Payment Collected for Copay and Account Balance
Add an Additional Receipt After Creating a Copay Receipt
Multiple Copays Collected
The Apply Copay Pop-up Did Not Display
Copay Details not Entered until after Charge Entry
Insurance Applied the Copay to the Wrong Line Item
Delete or Modify a Receipt
Related Articles
Create an Invoice Receipt and Post Invoice Payments
If you intend to use Invoices or Post Invoice Payments, you must add the System Setting: Admin > System Settings > General > INVOICE = Yes. Even if you do not send Invoices, the System Setting must be set to Yes to post an Invoice Payment. Create ...Post a Pre-Payment
Post a Pre-Payment to an Incomplete Charge This workflow is for groups who choose not to leave Receipts in Escrow for prepaid services. This process works well for paying Providers before services are rendered. Create an Incomplete Charge On the Post ...Patient Dashboard: Balance Panel
Balance Panel Features Filters The Balance Panel can be filtered by Billing Provider, Rendering Provider, or Facility if the panel is expanded. Select the Plus icon to expand the panel. Use the Lookup icon to select a Billing/Rendering Provider ...Payment/Receipt FAQs
Adjustments/CARC Codes How can I post additional Adjustments? Post an Adjustment from: Payment Dashboard Patient Dashboard Encounter Dashboard Learn More Multiple Adjustment Lines Rebill the Claim from the Adjustment screen Adjustment Transaction ...Payment Plans
If you are using one of our integrated Merchant Service vendors for credit card processing, Patient Payment Plans can be set up in the System. Payment Plans can be added from the Patient Dashboard, Payments Dashboard, Receipt Dashboard, or Guarantor ...