Open a Support Ticket
Access the Help Center Ticket Portal

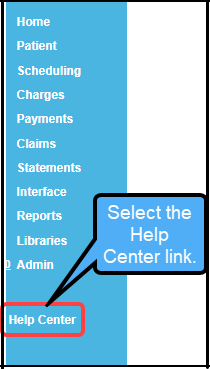
There are several ways to access the Help Center/Ticket Portal from the PM System.
- Select the Help Center link on the left side menu.
- Select the Life Preserver icon in the upper right corner.
- Select Show Me How on the bottom left.
- Select the ? on the top right.
- The View Ticket button is included in the automated email notification.
- This button will only work if the User has already logged into the PM System and used one of the methods above to access the Help Center.
Support Tickets
If you have been designated as a Support User, Tickets can be created to address your issues. Tickets are sent immediately to Support, and they will be answered as quickly as possible.

When you open a Support Ticket, please share enough detail for our team to understand your workflow and the issue you are experiencing. The more context you provide up front, the faster we can identify the root cause and get you a resolution.
Include a summary of:
What you were trying to accomplish
The steps you followed
What you expected to happen
What actually happened instead
If you have already tried troubleshooting steps or reviewed Help Center articles, please note that as well.
When applicable, include:
Workflow steps taken
Your end goal or desired outcome
The current, undesirable outcome
Examples such as Patient or Encounter IDs, Receipt IDs, Report names, or screenshots
Providing clear details allows Support to understand your scenario without needing to request additional information, which helps us resolve your ticket as quickly as possible.
Open a Support Ticket
- Select the Help Center on the Left Side Menu.
- Select Tickets on the top right or below on the right.
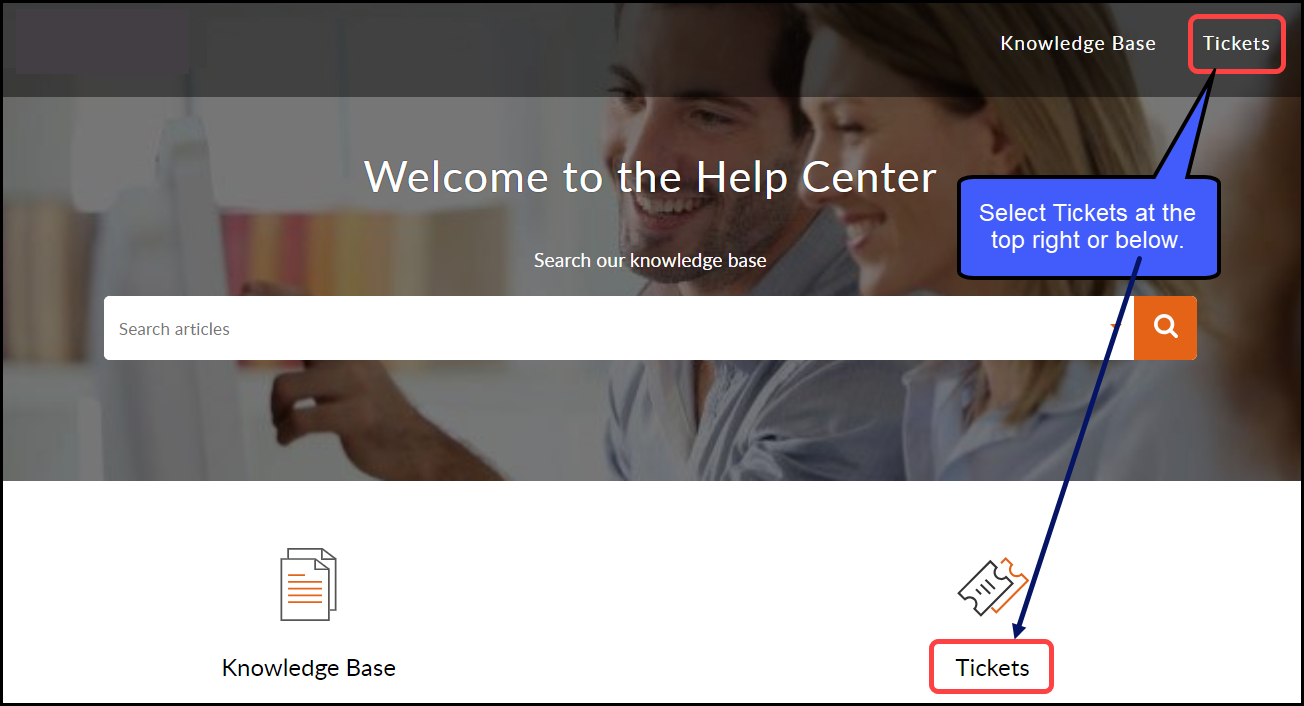
- Select Add Ticket.

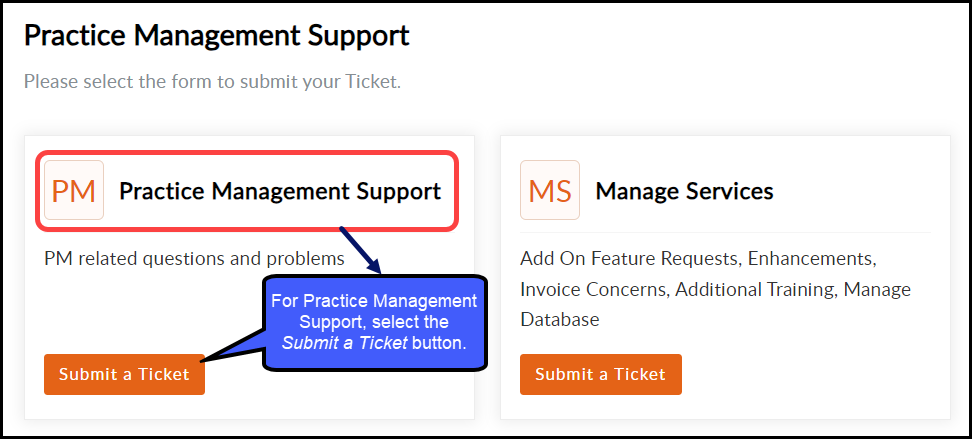
PM Practice Management Support
For PM related questions and problems, select the Submit a Ticket button under PM Practice Management Support.
Complete the Submit a Ticket Form
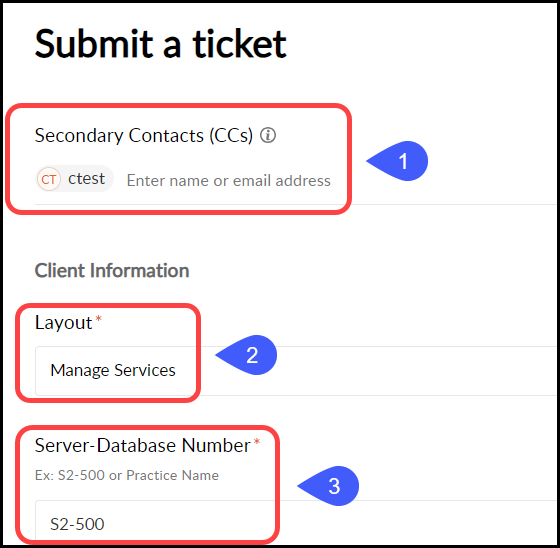
- Secondary Contacts (CCs): These are additional requestors of a ticket. They will be automatically added as recipients in replies of associated tickets and can access those tickets via the Help Center.
- Layout: Defaults to Practice Management Support.
- Enter your Server-Database Number.
- Example: S2-500
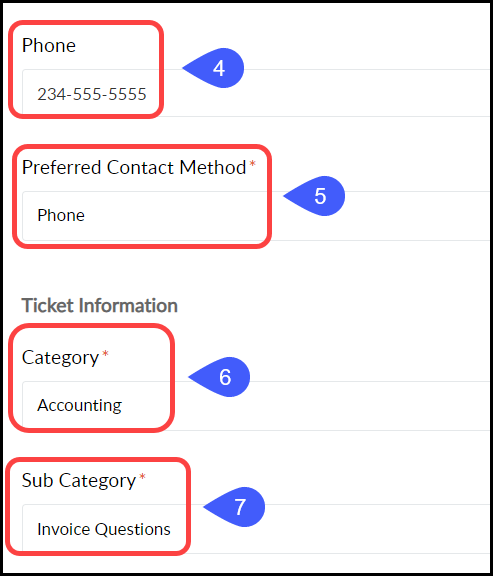
- Phone: Enter your Phone number if you want to be contacted by Phone.
- Preferred Contact Method: Choose how you want to be contacted.
- Help Center or Phone
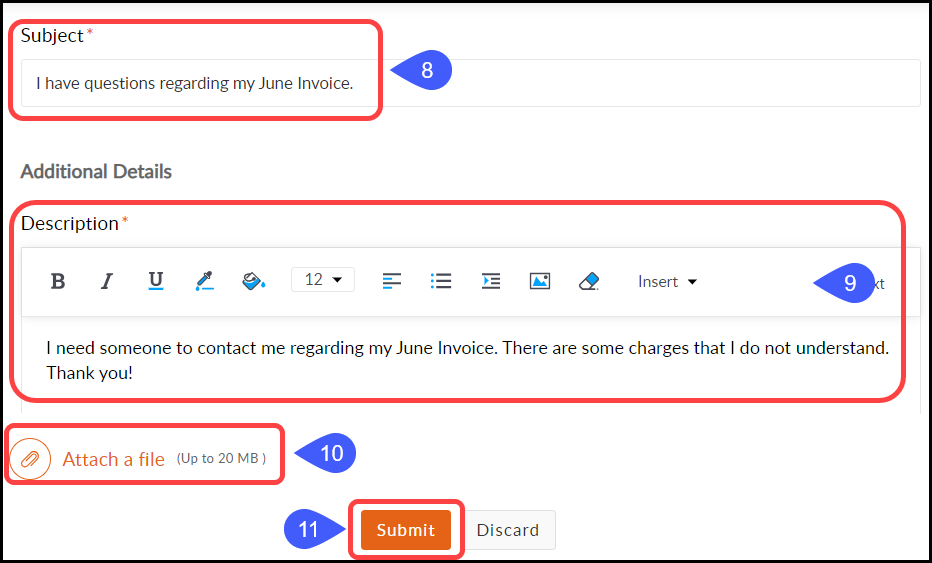
- Subject: Enter a subject that briefly describes your issue.
- Category: Select the Category that fits your issue.
- Example: Claims
- Sub Category: Select a sub category to define your issue further.
- Example: Claims - Professional
- Enter the Encounter Number If the field displays
- Example: e12345
Depending on the Category and Sub Category selected, specific fields will display.
- Additional Details: Complete this section with as many details as possible.
- Attach a File if applicable.
- Select Submit.
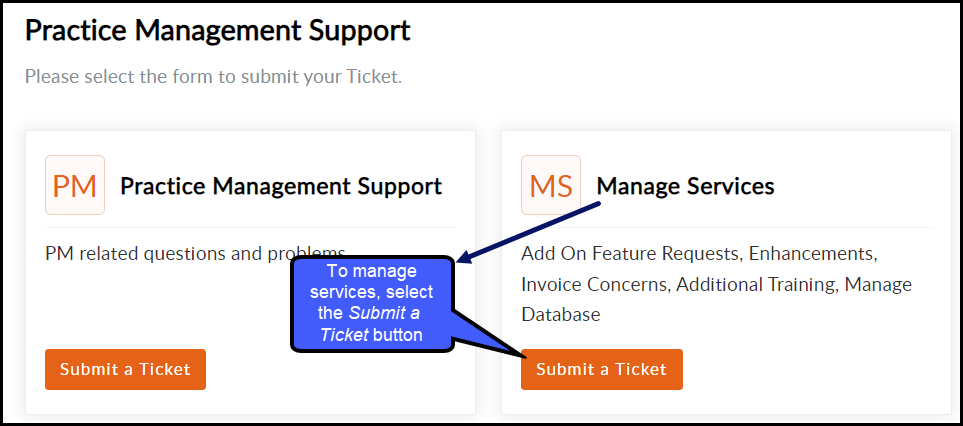
MS Manage Services
To manage the following Services, select the Submit a Ticket button under Manage Services.
- Premium Add-On Feature Requests
- IDology Scanning (Acuant)
- Appointment Reminders
- Balance Notifications
- Conversion
- Forms
- Interface
- Jopari Attachments
- Merchant Services
- Other
- Patient Estimation
- POPS
- Proxy Services
- Real-Time Claim Status
- Real-Time Eligibility
- SFTP Set Up
- Statement Services
- Enhancement Requests
- Admin
- Charges
- Claims
- Libraries
- Other
- Patient
- Payments
- Reports
- Scheduling
- Statements
- Interface - New
- API
- HL7
- Import - CSV File
- Outside Vendor - EMR Lab, etc
- Accounting: Invoice Concerns
- Invoice Address
- Invoice Contact
- Invoice Payment
- Invoice Questions
- Other
- Additional Training Requests
- Manage Database Requests
- Add Tax ID to Database
- Change DB Status - Training
- Custom Subdomain
- Go-Live Update
- Manage Shared Libraries
- Other
- Request New Database
- Retire Database
- View Only
- Manage Services
- IDology Scanning (Acuant)
- Appointment Reminders
- Balance Notifications
- Claims
- ERAs
- Interface
- Merchant Services
- Multiple Services
- Patient Estimation
- POPS
- Real-Time Eligibility
- Statement Services
- Training
- Established Client - Add-on Training
- Established Client - New Employee
Complete the Submit a Ticket Form
- Enter Secondary Contacts, if applicable.
- Layout: Select Manage Services
- Enter your Server Database Number or Practice Name (Ex: S2-500)
- If your Preferred Contact Method is Phone, enter your phone number.
- Select your Preferred Contact Method.
- Select the appropriate Category.
- Select the appropriate Sub Category.
- Subject: Enter a short description for the ticket.
- Description: Enter as much detail as possible.
- Use the Attach a file link to add an attachment.
- Select the Submit button.
Learn More
Find/Edit an Existing Support Ticket
Keep Active, Deactivate, and Reactivate User IDs
Related Articles
Support Ticket Portal FAQs
Ticket Button Why does the View Ticket button not work in my email? The View Ticket button does not work in my email When I select the View Ticket button, I get this message: It looks like your user has not been authenticated to access the ticket ...Find/Edit an Existing Support Ticket
Tickets Views On the Ticket Screen, choose a Ticket View from the right side menu. My Tickets: To view your Tickets, select My Tickets which is the default. Team Tickets: To view Tickets across the Organization, select Team Tickets. CC'ed Tickets: To ...Support Policies
Help Center The Help Center is available to all Users. Before submitting a support ticket, search the Help Center for answers to your questions. If you cannot find an answer in the Help Center, a Site Admin or Support User can submit a ticket. Site ...Open/Close, Attach/Detach, and Archive a Reference Batch
You may not be able to see all Reference Batches depending on the User's Permissions. A Reference Batch remains OPENED until you change the Status button to CLOSED. When finished reviewing the charges and payments, the Reference Batch should be ...Interface Troubleshooting
The following steps help you to investigate an Interface issue. Appointments are Not Updating on the Clinical Side Get a patient example. Go to Interface, and then go to Outgoing Messages. Select an Interface from the dropdown list. Select SIU from ...