Process an Insurance Virtual Credit Card Payment
Some Insurances make Payments with a Virtual Credit Card.
- In order to receive the funds, the information must be processed with a Credit Card Processor.
- If the Receipt is not handled appropriately, the Payment will reflect as a duplicate on the ERA Payments.
There are multiple ways the Virtual Card can be processed depending on the order that the ERAs and Virtual Credit Payments are received/posted.
Option 1: ERA is posted before the Credit Card Payment is Received
- Locate the ERA and select it.
- On the ERA Dashboard, select Attach New Receipt link.
- Enter the Received Amount.
- Method: Select Card.
- Select the Credit Card Type using the dropdown.
- Process Electronically should be checked.
- Select Manually Post.
- Select Save [F2].
Process the Credit Card
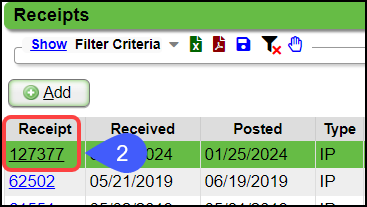
- On the ERA File Dashboard, select the Receipt number.
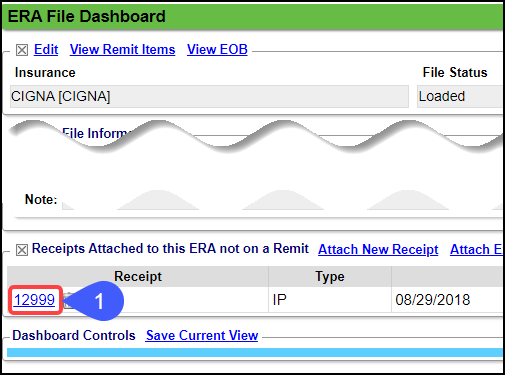
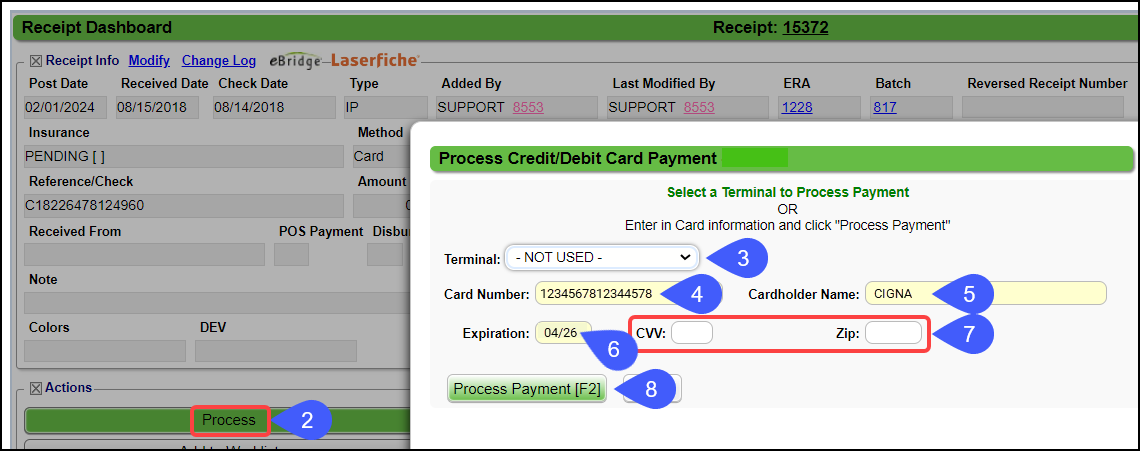
- Select the Process button.
- Terminal: Select -Not Used-
- Enter the Card Number.
- Enter the Cardholder Name.
- Enter the Expiration Date in this format: MM/YY
- CVV and Zip are optional.
- Select the Process Payment [F2] button.
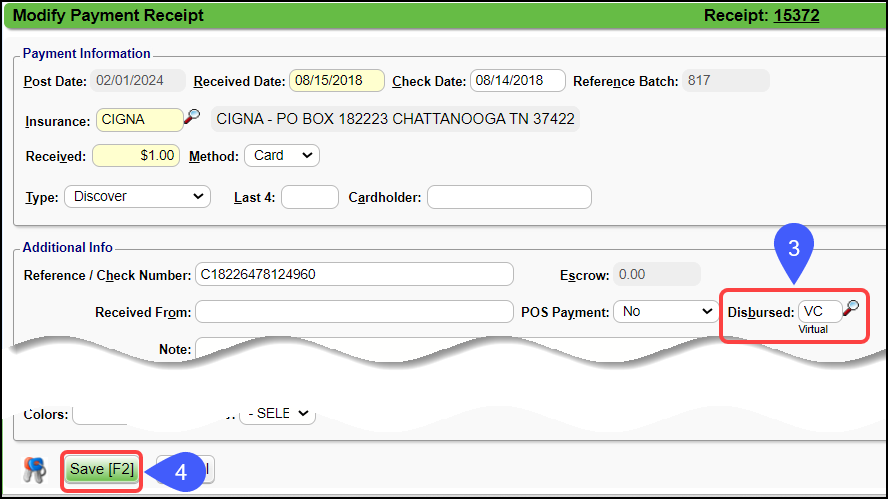
Disburse the Receipt
To avoid having a duplicate Payment, disburse the Receipt.
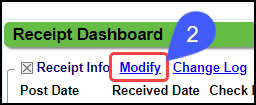
- Select the Receipt number on the ERA File Dashboard.

- Select the Modify link.
- Select the Disbursement Code, VC or CC.
- Add a new Disbursement Code if necessary.
- Select Save [F2].
Option 2: The Virtual Insurance Credit Card Payment has been processed separately from the ERA.
The Credit Card Payment is left in escrow. When the ERA is received, post the ERA as usual, and attach the existing Credit Card Receipt to the ERA.
- On the ERA Dashboard, select Attach Existing Receipt.

- Select the Receipt number for the Virtual Credit Card that was previously processed.
- Disburse the Receipt by following the Disbursement steps above.
Option 3: The Virtual Credit Card is processed, and the Payments are manually posted before receiving the ERA
- When the ERA is received, it should not be posted.
- Change the ERA Status to Posted Manually.
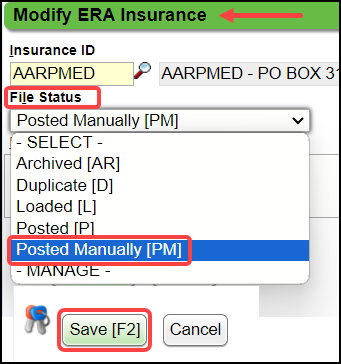
- Attach the existing receipt that has already been used to post the Payments manually.
- Use the Steps above for Option 2 to Attach an Existing Receipt.
Related Articles
Credit Card Services Overview
This feature is only available for clients that have System merchant service integration in place. Credit Cards can be used for Patient Payments and Insurance Payments. Credit Card Setup System Setting for Electronic Processing Checkbox If you are ...Pair your Device and Process a Credit Card Test Payment
Virtual Credit Card Device If you do not have a physical card reader, the Credit Card Processing screen in the System can be used to process credit cards. You can use a stored card or physically enter the credit card information. Pairing is not ...Add/Process a Credit Card Payment
A Receipt can be created for a Patient or an Insurance Credit Card Payment. You must have merchant (credit card) service integration in place for this feature to be available. If you are not using one of the System Merchant Services, you will not see ...Patient Copay/Account Payment from Appointment
The payment could be a Copay only or a combination of a Copay and Payment on Account. Patient Copay entered on the Appointment Screen Select the Appointment from the Calendar. On the Appointment screen, select the Copay link. If a Copay amount is ...Credit Management
Credit Management allows you to automatically Re-Apply Credits to outstanding balances. Instead of using the Re-Apply Patient Credit function on the Encounter Dashboard for each individual Patient, this function allows you to Re-Apply ...