Disbursed Receipts
Disbursed Receipts
Disbursements
On the Receipt, the Disbursed Field is available to flag items that do not belong in the System. It is to be used in scenarios where some or all of the Receipts are not to be posted. When Disbursing a Receipt, only the amount that is in Escrow will be Disbursed and removed from the A/R. Posted Transactions will remain and be reported.
The following codes are System delivered:
O - DISBURSED IN OTHER PM SYSTEM (most commonly used)
- This code is especially useful when transitioning PM systems.
Scenario: An ERA is received with Payment for Charges from your Legacy PM System. The System auto-generates a Receipt and marks it as Disbursed in Other PM. As a result, the Disbursed amount can be posted in the Legacy System and not affect the New PM System. The ERA Dashboard displays the amount that should be posted into the Legacy PM System.
E- ERROR CORRECTION
CP - CAPITATION PLAN
- If you do not wish to post the Payment, you can create a Receipt and Disburse it using this code.
This field is editable by users who have permissions to 'Modify' a receipt. This field may take place at any point in any reporting period. The Receipts management has filters to view disbursed receipts.
Add a Disbursed Code
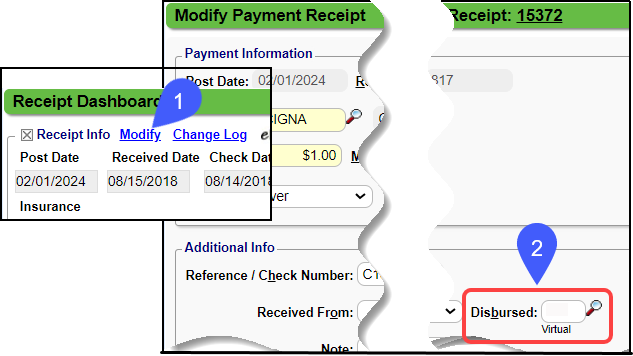
- On the Receipt Dashboard, select the Modify link.
- On the Modify Receipt screen, select the Lookup icon on the Disbursed field.
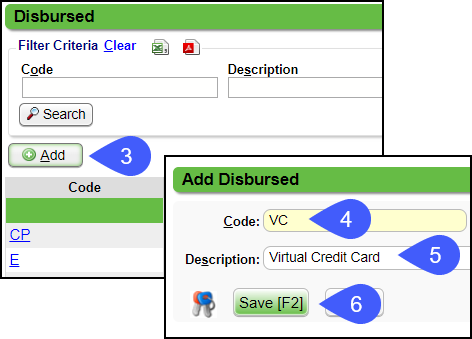
- Select the Add button.
- Enter a one or two digit Code
- Enter a Description.
- Select Save [F2].
Receipt Disbursed in Error on an ERA
The system uses the Patient and Encounter numbers to create the Account number(123e896) that appears on the Claim and the ERA Payment.
- At times, the Account number on the ERA file does not match the System number.
- The System will generate a Receipt that disbursing incorrectly with an 'O' in the Disbursed field.
Modify the Receipt to remove the 'O' in the Disbursed field
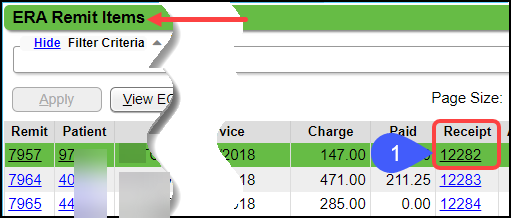
- From the ERA Remit screen, select the Receipt number link.
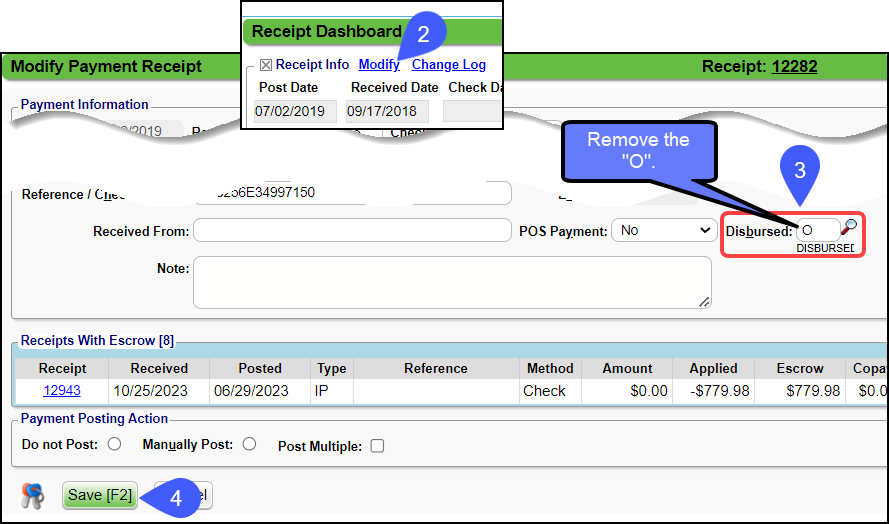
- Select the Modify link on the Receipt Dashboard.
- Remove the 'O' in the Disbursed field.
- Select Save [F2].
Manually Post the ERA Receipt
Map an Encounter received on the ERA with a Truncated Account number
This mapping cannot be undone. Use with Cautions!
This Encounter will not be recognized as a new System Payment.
- If posted, it will be treated as an Old System Payment and will be disbursed.
Connect the Encounter before posting the ERA:
On the ERA List screen, use the Filter CriteriaFilter by Status, Old System.
- Status: Select Loaded or All.
- On the Filter, Old System Remits, select Only from the dropdown.
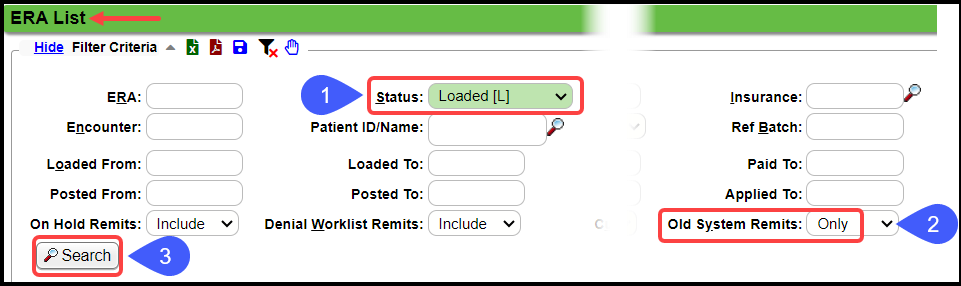
- Select the Search button.
- Select the Remit number.
- Select the zero Encounter link.
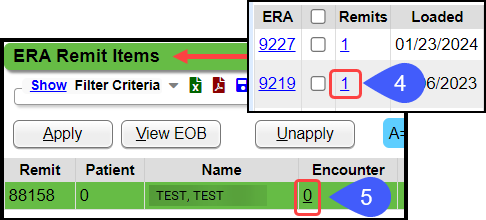
- In the Lookup, select the Encounter number.
***Be sure the DOS and details match correctly.***
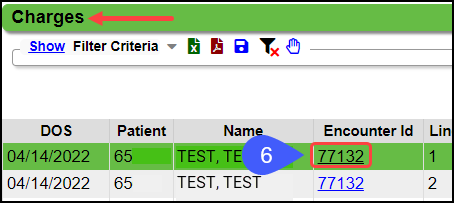
The Encounter is now mapped and can be posted as usual.
Related Articles
Payments, Receipts, and Escrow Overview
Receipt vs. Payment information The System is an Encounter/Charge based Accounting System. Receipts and Payments are fundamentally different. The Receipt holds the details of the money received, who the Payer is, how much was deposited in the bank. A ...Receipts with Payments Posted in a Closed Period
If a Receipt was entered in error and cannot be deleted because the Payments were posted in a closed period, use the following process. This process removes the Payment from the current reporting period's A/R. You can use the Receipts Management ...Receipt History
Go to Payments > Payment Dashboard > Receipt History Receipt History is where all Receipts reside, whether they are fully posted, partially posted, or not posted at all. On the Payment Dashboard, select the Receipt History link. The letter, R, can ...POPS Receipts
Each time the Patient makes a Payment on POPS, by mail, or in the office, a Receipt is created and displayed on POPS. When the first POPS Payment is made in a day, a new Reference Batch is automatically opened by the System with the following ...Find Receipts with Escrow
Working Escrow (unallocated funds) is a crucial step in managing Patient A/R. You can find Receipts with Escrow from multiple places in the System: Receipt Management Report Payment Dashboard Receipt History Use the Receipt Management Report Select ...