Print EOBs for Paper Claims
Print an EOB for Paper Claims
- On the Encounter Dashboard, an EOB can be printed along with the Secondary/Tertiary Paper Claim that is printed on Plain Paper.
- EOBs can be printed for Payments that were posted manually.
- In the Policy Breakdown panel on the Encounter Dashboard, an EOB can be individually printed.
- Batch EOBs can be printed from the Claims Batch Dashboard for HCFA/UB Batches.
Print a Claim and EOB on Plain Paper from the Encounter Dashboard
When printing the Secondary or Tertiary Claims on plain paper, you can choose to print the EOB from the previous Payer at the same time. This can be done in a batch of print Claims or a single Claim from the Encounter Dashboard.
- On the Encounter Dashboard, click the Print Claim button.
- Choose the Secondary or Tertiary Insurance from the Print Claim For dropdown.
- Select Set Status to Printed to change the Claim Status on the Encounter Dashboard after Printing the claim.
- Use Form: Select HCFA.
- Select the checkbox for Preview. When selected, the claim will Print/Preview with the Claim data and the HCFA fields as they appear on a HCFA form.
- Select the checkbox for Include EOB.
- Select the Run button.
Print EOBs for Payments Posted Manually
EOBs for manually posted Payments will print when Include EOBs is selected on the Print Claim screen.
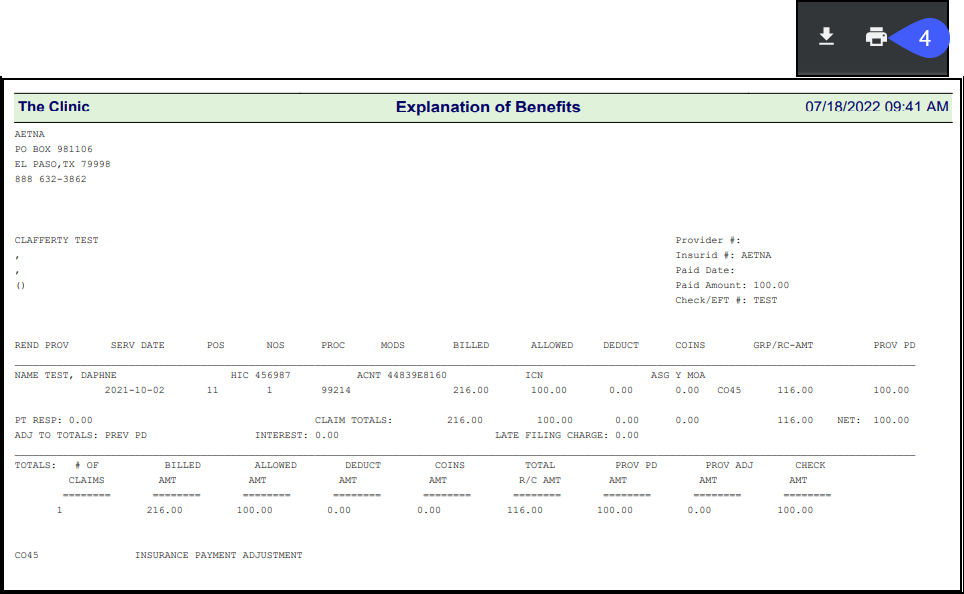
When you manually post an Insurance Payment, the System creates an EOB that can be sent with your Secondary or Tertiary Claim. The ERA also creates an EOB on the Encounter.
- On the Encounter Dashboard, select the Print Claim button to print the Claim on a HCFA/UB Form.
- After printing the Secondary/Tertiary Claim, select the Payment History link in the Balance panel on the Encounter Dashboard.
- Click the EOB link on the Remit to be printed.
- Use your Print icon to print the EOB.

Print EOBs by Batch from the Claim Management Dashboard
- After the Claims are batched, select the HCFA/UB Batch number on the Claims Management Dashboard.
- Use the Print the EOB button to Print all of the Secondary/Tertiary EOBs for the Claims in this Batch.
- The CARC/RARC explanations do not print on the EOBs.
Troubleshooting Print Problems
Related Articles
Print Batched Paper Claims on a HCFA Form or on Plain Paper
Print a Claims Batch After batching your Claims, on the Claims Management Dashboard, go to the Claim Batches to Be Sent/Printed panel. This panel does not include Batches that contain Encounters in a more recent Batch. Find the batch with Type HCFA. ...Print One or Multiple Paper Claims
Print One Claim at a Time from the Encounter Dashboard From the Encounter Dashboard, select the Print Claim button. Set Status to Printed: If selected when you Run to generate this claim, the Encounter Status will be updated to PRINTED. Print Claim ...Alignment for Printing Paper Claims on a HCFA/UB Form
Printer Setup When printing a Claim on a HCFA or UB Form, the Print Alignment will need to be adjusted for a shared office printer or your personal printer. Print a HCFA or UB from the Encounter Dashboard Run and Print a single Claim from the ...Post an Insurance Payment Manually
Before posting, add an Insurance Receipt for the full amount of the check. Manually Post a Primary Insurance Payment Using the Receipt that was created for this payment, select the Post button. Enter the Encounter number preceded by an e (e1234) and ...Print/View an EOB for an ERA
Print/View an EOB Print an Entire EOB from the ERA File Dashboard Enter ERA in Navigation Box or from Payments on the Left Side Menu, choose the All ERAs link. Use the filters to search for your ERA or enter the ERA number in the ERA field and select ...