Post an NSF for a Patient Payment
Post an NSF for a Patient Payment
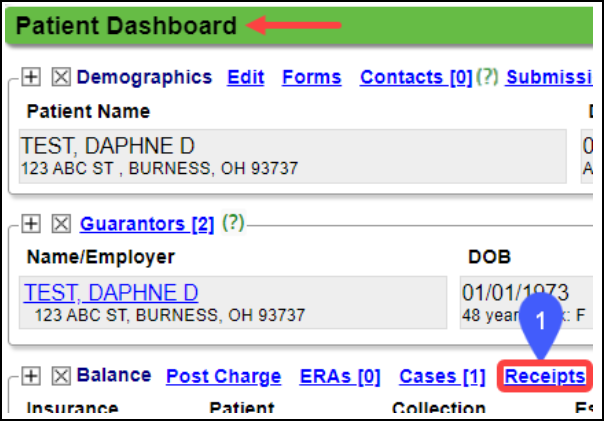
- On the Patient Dashboard, select Receipts.
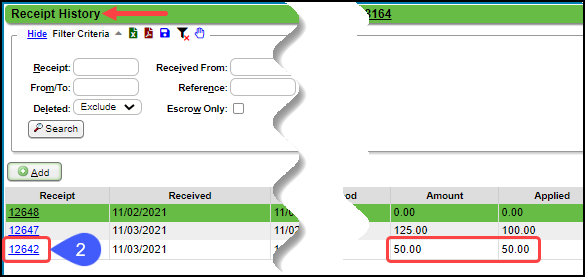
- Select the returned receipt ID from the Receipt History panel.
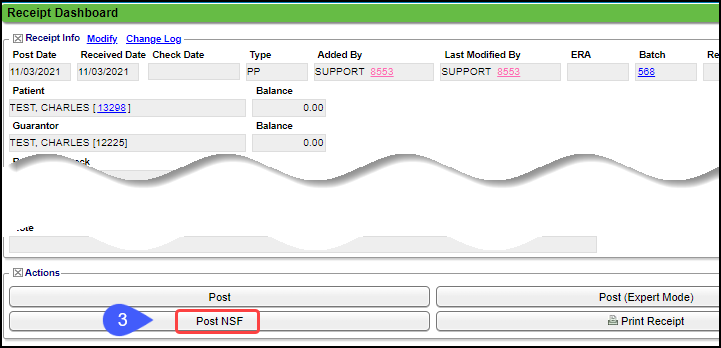
- Select the Post NSF button.
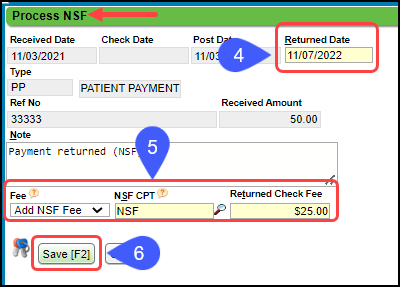
- Returned Date: This is the date the check was returned as an NSF.
- Choose one of the following options:
- Fee (Returned check fee): Choose one of the following options from the dropdown.
- Add NSF Fee:
- A new Encounter will be created.
- NSF CPT®: This field defaults to NSF.
- Returned Check Fee: This fee can be set up in the Procedure Code Library, or it can be entered or changed here.
- No NSF Fee: If this option is chosen, the NSF CPT and Returned Check Fee do not display and a new Encounter will not be created.
- Select Save (F2).
Receipt Dashboard after Posting the NSF
- The Receipt Dashboard displays a yellow banner showing that a new Encounter was created for the NSF Charge.
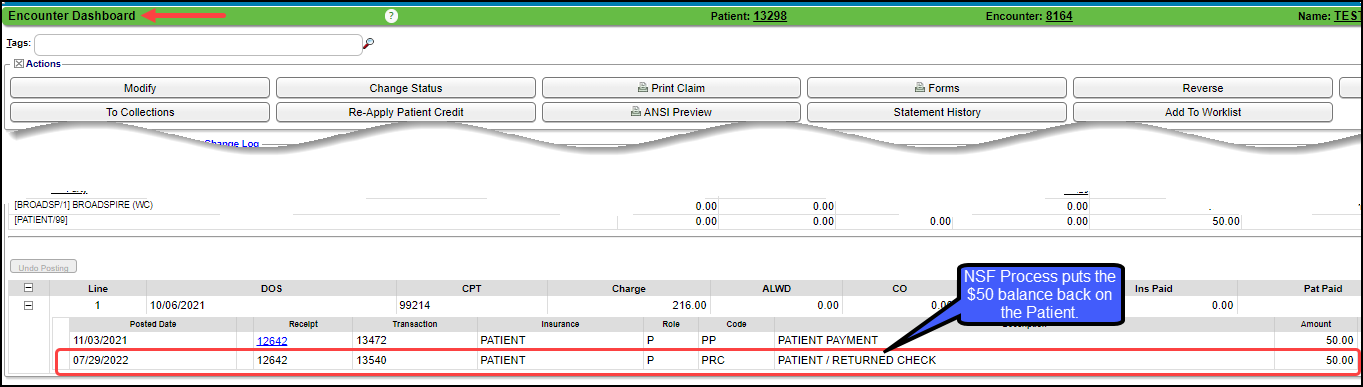
- The PRC Transaction is added to the original Encounter.
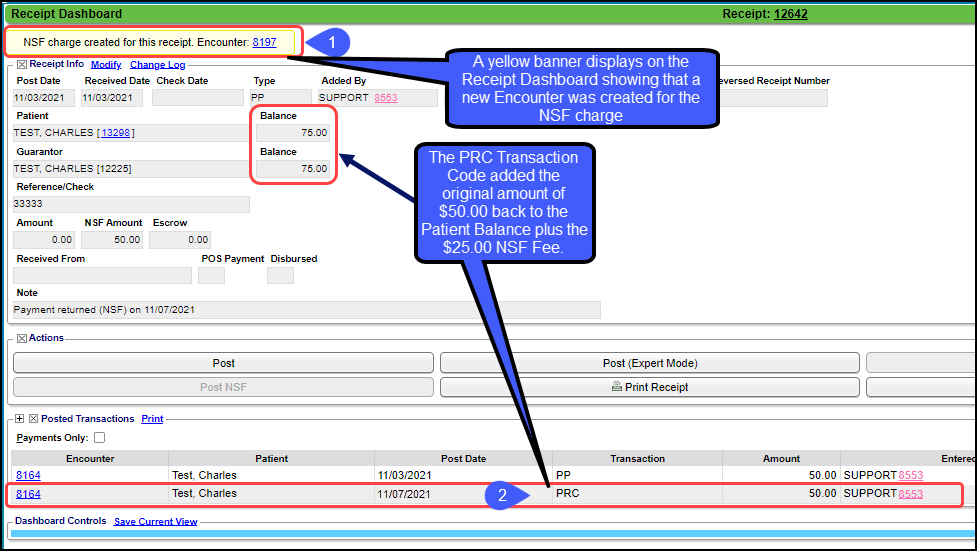
Receipt Dashboard Changes
- On the Receipt History screen, the NSF Receipt is highlighted in yellow.

Encounter Dashboard
CPT® copyright 2019 American Medical Association. All rights reserved.