Open, Close, Link, Unlink, and Archive a Reference Batch
You may not be able to see all Reference Batches depending on the User's Permissions.
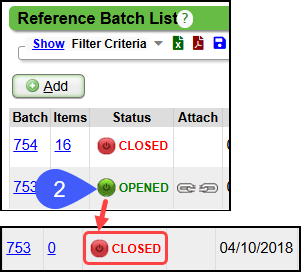
A Reference Batch remains OPENED until you change the Status button to CLOSED.
- When finished reviewing the charges and payments, the Reference Batch should be Closed.
- The Chain link icon that is highlighted in green indicates that you are linked to the Reference Batch.
- If it is not highlighted in green, it is unlinked.
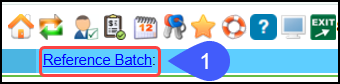
- If you are linked to a Reference Batch, the Batch number will show on the upper right of the screen.
- You can only be linked to one Reference Batch at a time.
A Reference Batch remains Open until you change the Status to Closed unless the Reference Batch is a POPS Reference Batch.
When finished reviewing the charges and payments, the Reference Batch should be Closed.
A Reference Batch can be re-opened after it has been closed.
When to Link a Reference Batch

- Creating, Deleting, or Modifying a Receipt
- Voiding or Refunding a Receipt
- Posting Payments (Manual, ERAs, and Copays)
- Posting Adjustments
- Entering Charges
- Doing Write-offs
Open/Close/Unlink a Linked Reference Batch
Close and Unlink a Reference Batch
If there is a Linked Reference Batch, it will display on the upper right of your screen.
Select the Reference Batch number.
To Close the Reference Batch: On the Batch Details banner, select the Green Globe beside the Status, Opened.
The Reference Batch will be Closed and Unlinked.
The Reference Batch will no longer be available on the upper right.
Unlink without Closing
Select the Reference Batch number.
Select the Chain Link on the banner to unlink the Reference Batch without closing it.
Close/Open an Unlinked Reference Batch
Close an Unlinked Reference Batch
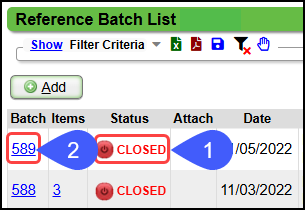
On the top right, select the Reference Batch link.
On the Reference Batch, select the Green button to Close,
The Green button will change to a Red button with the Status of Closed.
If the Reference Batch was linked, it will be unlinked automatically.
Reopen and Link a Reference Batch
Select the Reference Batch link on the upper right.
Select the Red button to reopen a Closed Reference Batch.
Select the Chain to link to the Reference Batch.
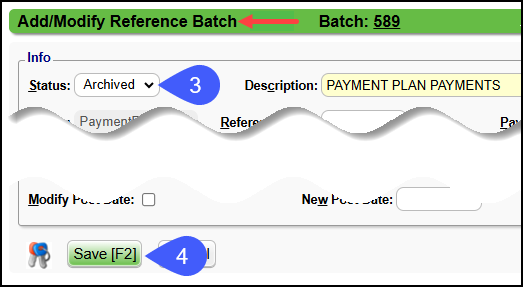
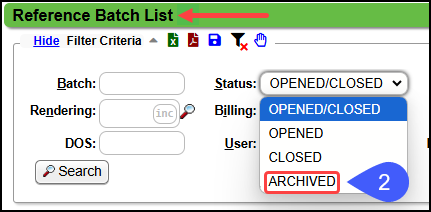
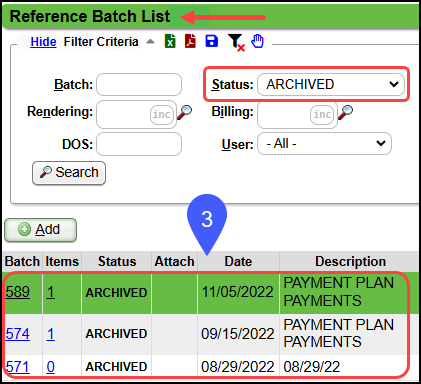
Archive a Reference Batch
Learn More
Add/Modify a Reference Batch
Reference Batch Overview
Reference Batch List and Details
Reconcile Reference Batch Receipts
Move an Encounter or Receipt
Validation Error: You must be attached to a reference batch...
Reference Batch System Settings
Related Articles
Reference Batch FAQs
Access to Reference Batches by User and Role Why am I getting this Validation Error: You must be attached to a Reference Batch? User Access to Add, Modify, Close, or Change a Reference Batch In User Maintenance, you can set who has specific ...Add/Modify a Reference Batch
On the Reference Batch List screen, you can add or modify a Reference Batch. Add a Reference Batch From the Reference Batch List page, select Add to create a new Reference Batch. The Batch Status defaults to Opened. Add a Description for the items to ...Reconcile Reference Batch Receipts
Reconcile Reference Batch Receipts Reference Batches can be used to reconcile your receipts. Compare the Receipts column with the Payments column. The Receipts column represents the amount that was entered when the receipt was created, and the ...Reference Batch Report
Reference Batch Report Select the Reference Batch link to access the Reference Batch List screen. On the Reference Batch Details screen, click the number link in the Items column to open the Reference Batch of your choice. From the Batch Details ...Tag Workflows: Attach, Resolve, Delete
Tags can be worked from several areas in the System. Tagged Encounters Dashboard Encounter Dashboard Patient Dashboard (Balance Panel) Note: Tags that appear on the Patient Dashboard in the Balance Panel are Encounter Tags. Encounters by Status List ...