Create a Dental Claim
2024 ADA Dental Claim Form ©
- You can now clearly identify Claims for services done by a locum tenens dentist.
- The Payer ID can now be reported on the Claim.
- The last scaling and root planing dates can now be reported.
Create a Dental Claim
Dental Claims are entered on the Post Charge screen just like Medical Claims with a few differences.
On the Charge Entry screen, select Dental for the Claim Type.

Quadrants, Tooth Numbers, and Surfaces are entered in the Modifier fields.

When the Charge is Saved, a second entry screen will display to enter additional information.
Additional Dental Fields
Additional information about the dental procedure(s) can be added on this screen.
- Ancillary Claim Info
- Total Months of Treatment
- Months of Treatment Remaining
- Tooth Status
- M: Missing
- E: To be Extracted
- Tooth Information: This panel is controlled by the Tooth Identifier or Surface area entered in the Modifier 1 field.
- Select Save [F2] when finished.
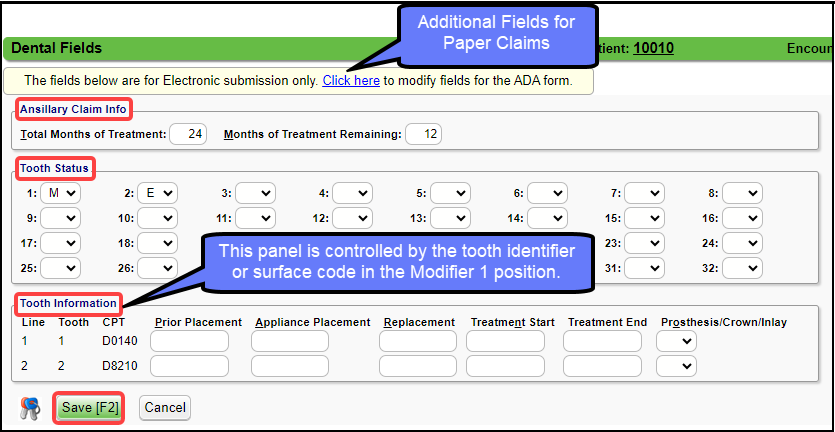
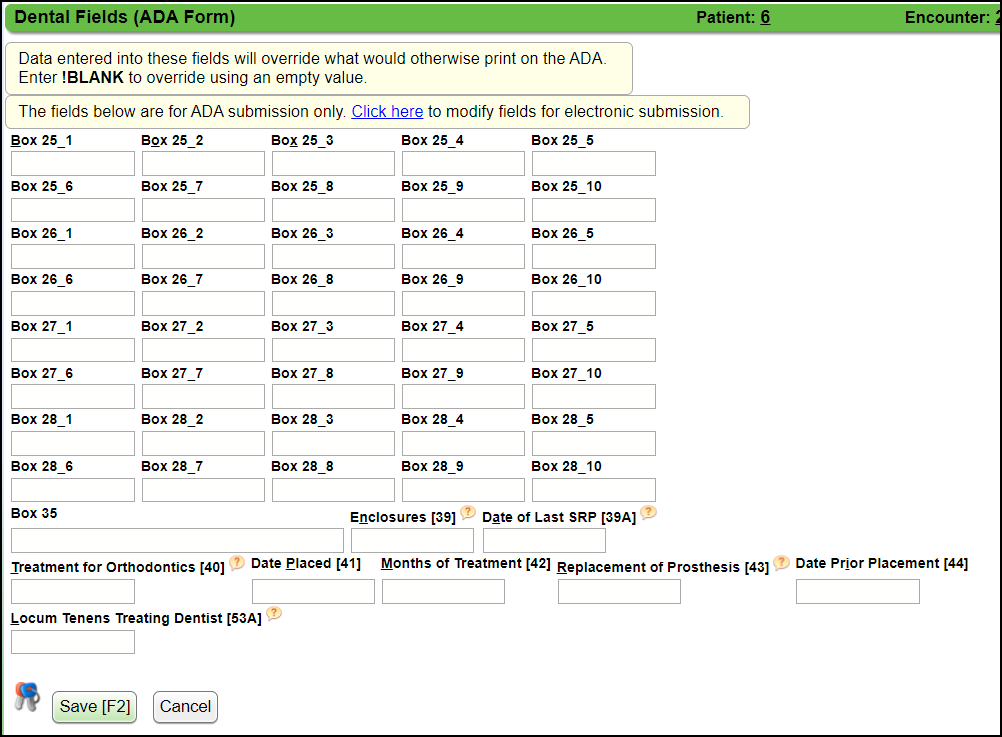
Additional Fields for Paper Claims
In the screenshot as shown above, select the Click here link to modify the fields on a paper Claim.
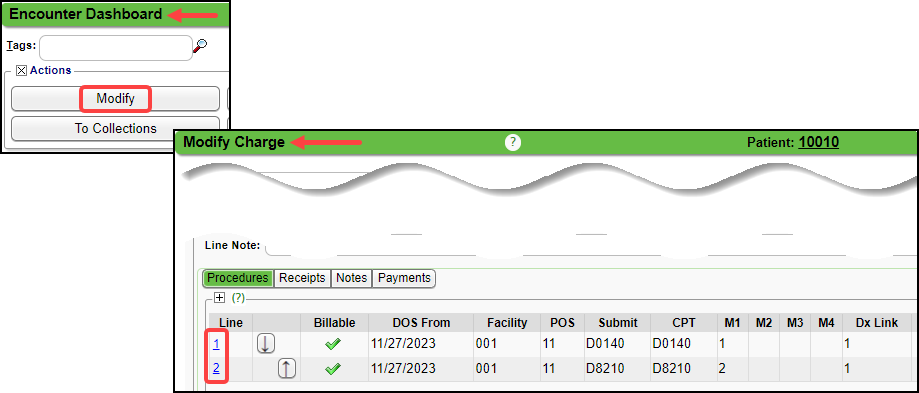
Modify a Dental Charge
To modify a Procedure or Modifier, select the Modify button on the Encounter Dashboard.
- In the Procedure panel, select the line item number.
To modify the Dental fields: Ancillary Claim Info, Tooth Status, and Tooth Information, select the Dental Fields link on the Encounter Dashboard to make changes to these fields.
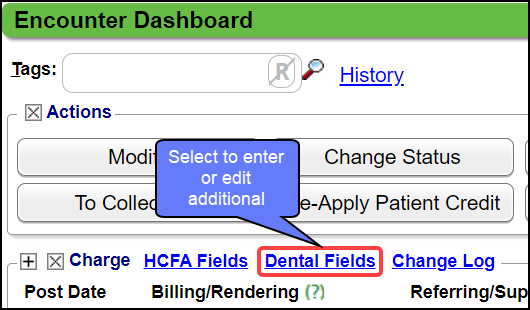
For Paper Claims, select the Click here link to modify the fields.

Additional instructions on completing the ADA paper claim form (external link:
ada_dental_claim_form_completion_instructions_2024.pdf
Learn More
Dental Set Up
Batch Claims
Related Articles
Electronic Dental Claims Setup and Overview
Before creating Dental Claims, some preliminary set up needs to be done. Ask Support or your Implementation Manager to activate the Internal Setting(s). Dental Setup Dental Payer On the Insurance in the Insurance Library, select Electronic/Dental for ...Resubmit a Claim
***Do not Delete or alter the Procedure Line if it has already been billed.*** See Submit a Claim with a Different Procedure Code. Resubmit a Claim When a Primary Claim is resubmitted, the full amount of the Charges is always sent on the Claim, even ...Enrollments: Create Enrollments Panel
Create Enrollments Panel Home Dashboard > Actions Panel > Enrollments button > Create Enrollments Panel Enrollment Templates Begin the Enrollment process by creating your Enrollment Templates. Enrollment Templates are used to auto-fill the Forms. If ...Customize the Encounter by Status Panel (Claim Status)
The Encounter by Status Panel can be customized by moving and/or adding Claim Statuses. Change the Order of the Claim Statuses On the Libraries screen, select the Claim Status button. Change the order the Statuses appear in the Encounters by Status ...Charge/Claim FAQs
Charge/Claim FAQs Attachments How do I indicate there is attached paperwork? Attached Paperwork Attending Physician What is an Attending Physician? Attending Physician An Attending Physician is the one who is responsible for the overall care of a ...