Setup for Manually Posting Interest and Penalty
Set up an Interest Adjustment Transaction Code
Create a custom Transaction Code to adjust the Interest/Penalty off the current A/R depending on your accounting practices. An alternative is to enter a Charge for the same amount as the Interest, but keep in mind that this would affect Charge amounts for reporting.
- From Libraries on the Left Side Menu, select the Transaction Codes button.
- Select Add.
- Code: Enter INTADJ.
- Type: Choose Debit from the dropdown list
- Group: Use the Lookup icon to choose IC.
- Description: Interest
- Abbreviation: Interest
- Responsibility: Select All Insurances from the dropdown list.
- Report As: Choose Write-Off from the dropdown list.
- Selct Save [F2].
Setup an Interest Payment Transaction Code
- Select the Add button in the Transaction Code Library.
- Code: Enter INTPAY.
- Type: Choose Credit from the dropdown list.
- Group: Use the Lookup icon to choose IP.
- Description: Interest Payment
- Abbreviation: INTPAY
- Responsibility: Select All Insurances from the dropdown list.
- Report As: Choose Payment from the dropdown list.
- Select Save [F2].
This System is an Encounter-based accounting system, and you must have an Encounter to post a Payment against. If the Interest or Penalty is for a specific, existing Encounter; you may skip this step.
Create an Encounter to Post the Interest or Penalty
- Create a Generic Patient. For Example:
- First Name: Interest
- Last Name: Interest
- Create an Insurance Profile for the insurance charging or paying the Interest.
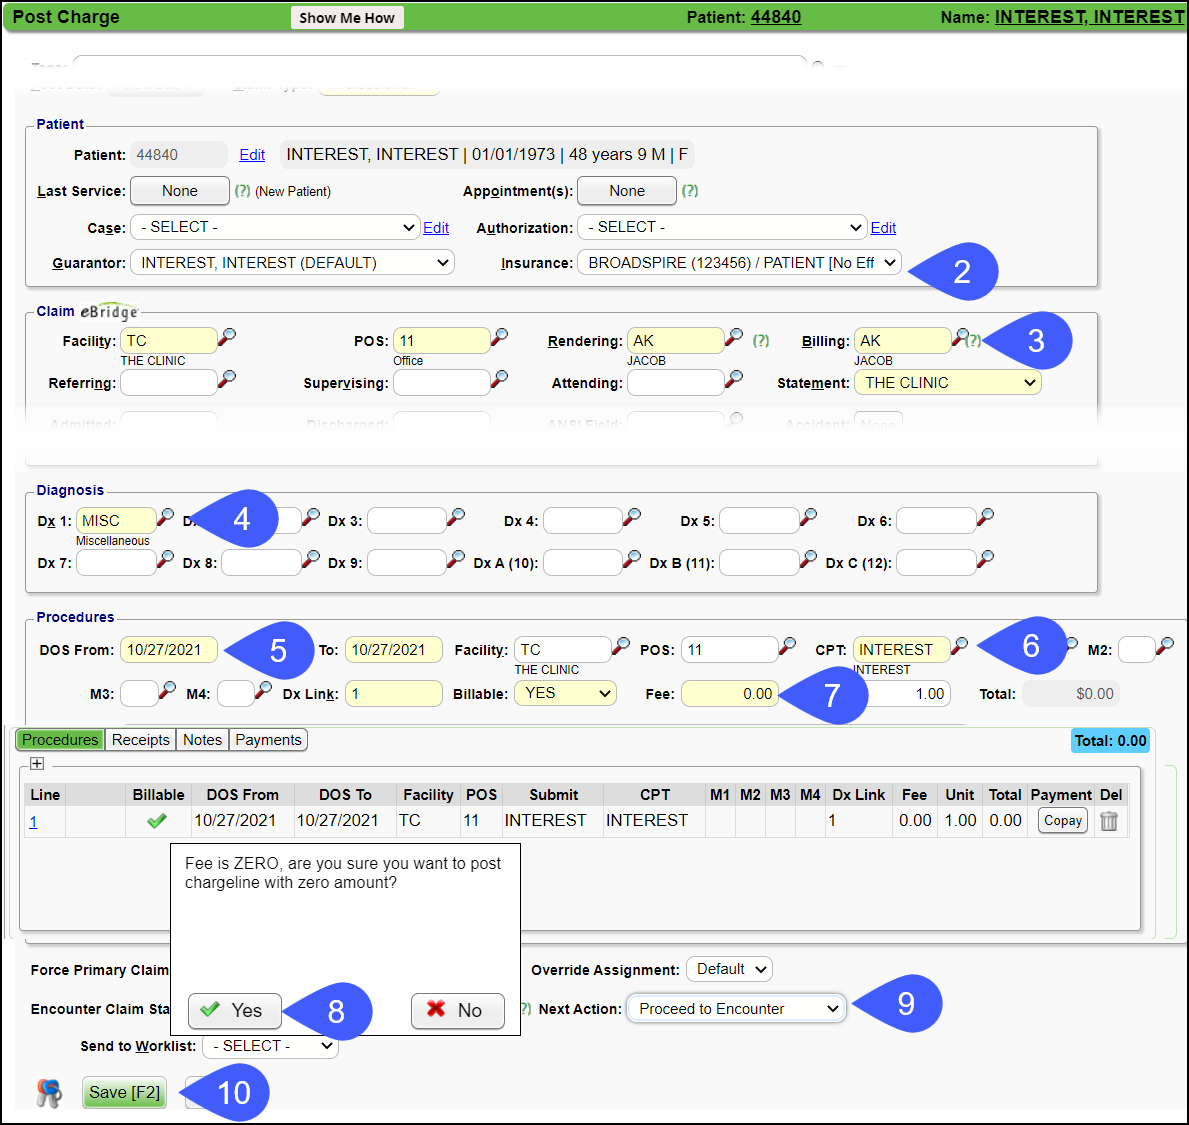
Add a New Charge to the Generic Patient
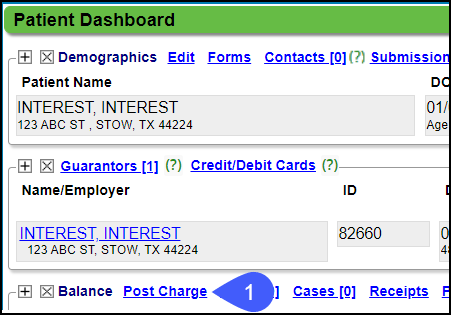
- Select the Post Charge link on the Patient Dashboard.
- Insurance: Choose the Insurance from the dropdown.
- Select the Facility and Provider.
- Use the Diagnosis Code, MISC.
- Enter a Date of Service: You can use the date of the ERA/EOB, Reference Batch, or the current date.
- Use the CPT, Interest or MISC.
- Fee: Enter 0.00.
- Validation Warning for $0.00 Charge: Yes
- Choose Proceed to Encounter from the dropdown.
- Select Save [F2].

After the setup is done, the User can manually post the Interest or Penalty.
Learn More
Manually Post the Interest or Penalty
Auto-Apply ERA Interest
Related Articles
Manually Post Interest or Penalty
Post Interest to an Interest Account Create an Interest Account: Setup for Manually Posting Interest and Penalty. Set up an Interest Payment and an Interest Adjustment Transaction Code if it has not already been done. If you do not have an Interest ...Post an Insurance Payment Manually
Before posting, add an Insurance Receipt for the full amount of the check. Manually Post a Primary Insurance Payment Using the Receipt that was created for this payment, select the Post button. Enter the Encounter number preceded by an e (e1234) and ...Auto-Apply Interest on ERAs
Release v4.8 Interest can be Auto-Applied on ERAs. The Transaction Codes for Interest are: IIP: Insurance Interest Payment Credit IID: Insurance Interest Payment Debit Encounter Level If the Interest is reported on the Encounter level, it will post ...Create a Patient Receipt/Post Payment Manually
Patient Receipt Creation If the Copay was not entered during the Check-in/Check-out workflow or if your Practice does not use the Calendar: Enter NR in the Navigation box (Go-Cuts) shortcut; Use the Post Payment link on the Patient Dashboard; Use the ...Manually Post an ERA
Manually Post an ERA Remit If the ERA cannot be posted electronically, the Manual Post button can be used or manually post as you would a Paper Remit. Use the Manual Post button to Post a Remit Select the Remit number. Select the Manual Post button. ...