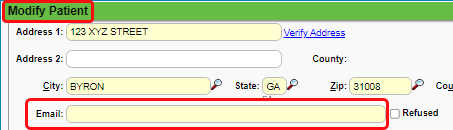
Mandatory Fields
The Keys icon shows on data entry screens and are only available to users who have permission to use the Admin Form Keys. The keys are next to the Save at the bottom of the page.
Accessing the Keys for Mandatory Fields
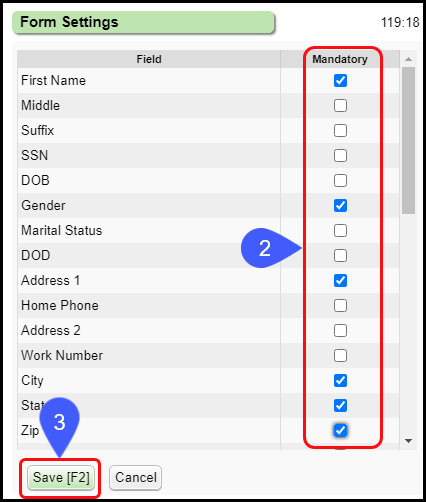
A window opens with a list of available fields.
- Select the Keys icon.
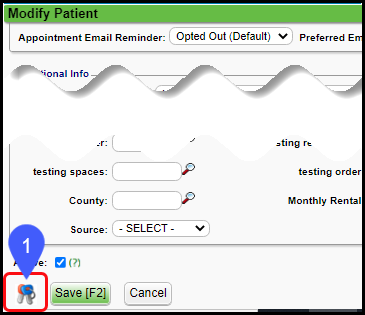
- To make a field mandatory, select the checkbox or deselect to make the field not mandatory.
- Click Save [F2].
On Some Older Screens
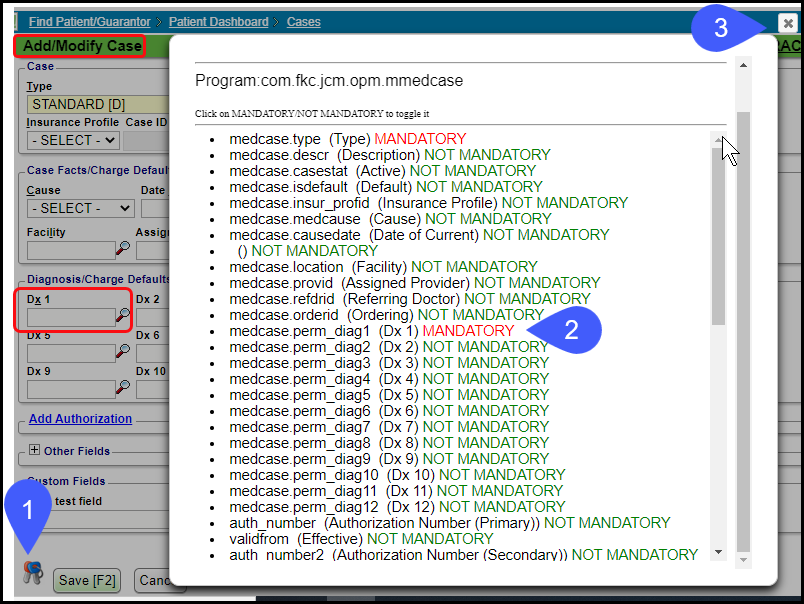
- Click the Keys icon.
- Next to the field name, click on Mandatory or Not Mandatory to toggle between the two.
- Close the pop-up window.
Example: Make Dx 1 mandatory on a Case, select Not Mandatory to toggle to Mandatory.
Required Fields for Patient Demographics
There are three pages where you can edit the required Patient Demographic fields. This allows for a quicker registration from the Calendar and enforces a different workflow for Check-in. For example:
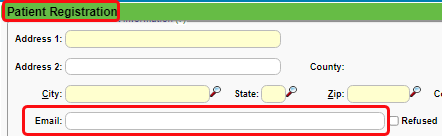
- Email address is not required during Registration when the appointment is made. On the New Patient Registration screen, make it not mandatory.
- Email is required during Check-in on the edit Demographic screen.
Make Email Not Mandatory on the Patient Registration screen
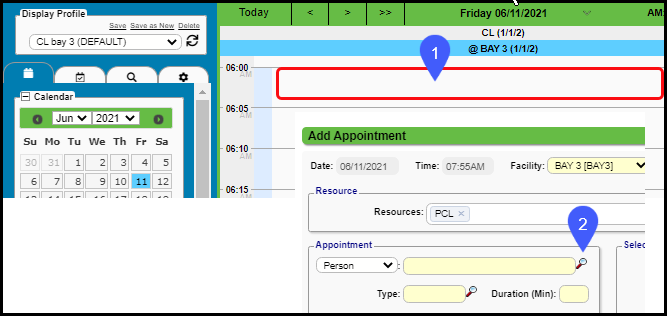
- On the Calendar, click an empty appointment slot.
- Click the Patient Lookup icon.
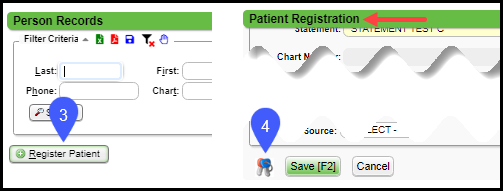
- Select Register Patient.
- Go to the bottom of the Patient Registration screen and select the Keys icon to open Form Settings.
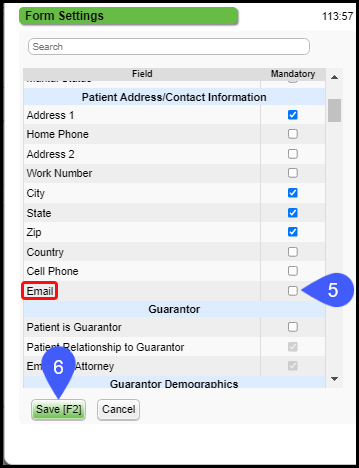
- Deselect Email.
- Select Save [F2].
Make Email Mandatory on the Modify Patient screen (Edit Patient on the Patient Appointment screen)
- On any Patient's Dashboard, click Edit in the Patient Demographic Panel.
- Go to the bottom of the Modify Patient screen and click the Keys to open Form Settings.
- Select Email.
- Select Save (F2).