Patient Instructions for POPS
Use a Website Link to Access POPS
POPS is a patient portal where Patients/Guarantors can make Payments to their Medical Provider with greater convenience.
- You can pay by credit/debit card, Apple Pay, or Google Pay.
- Your Landing Page will be the Home Page or the Pay Page.
- The screenshots below are the QuickPay view using a Cell Phone.
- If you are logging in from a PC, you will enter the Full POPS Portal.
- The functionality is the same for both even though the look is a little different.
- You can log into POPS using a website link in a Notification, Text, or on the Practice website or by using a QR Code on your Statement.
- You can pay in the office using POPS.
- The Provider's office will generate a QR code for you to scan in order to make a payment which eliminates using your physical credit card.
Log In using a Website Link
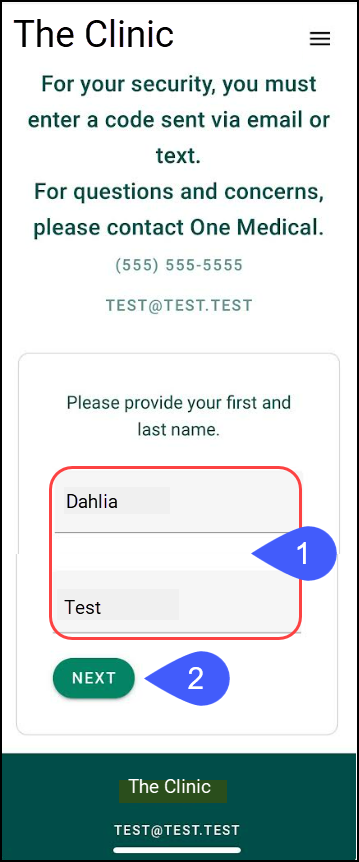
Select the link from a Notification, Text, or the Practice website.
- Enter the Guarantor's First or Preferred Name and Last Name.
- This must be exactly the same as the Practice has in their System.
- Select Next.
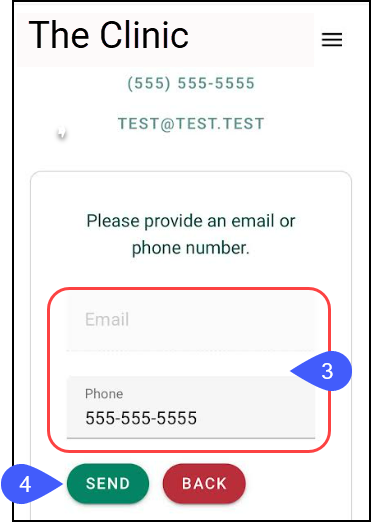
- Additional Verification: Enter an Email Address or a Mobile Number to receive a Code to enter on the next screen.
- Select Send.
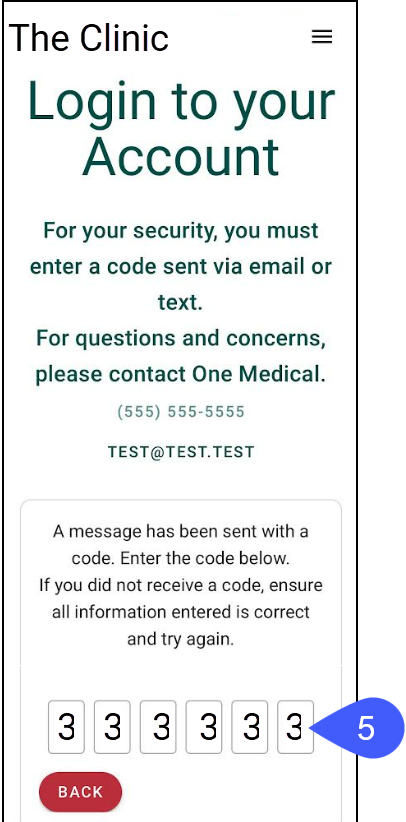
- Enter the Code that you received.
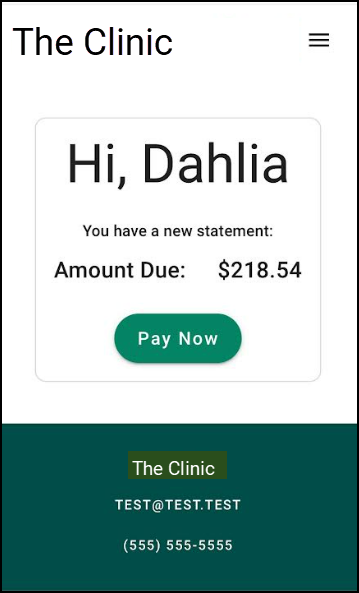
Landing Page
You will land on one of these two pages.
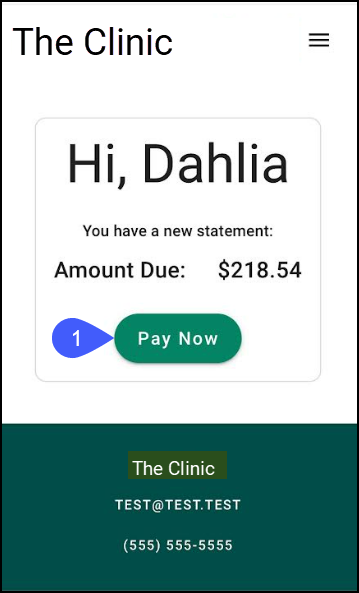
- Mobile Home Page, or
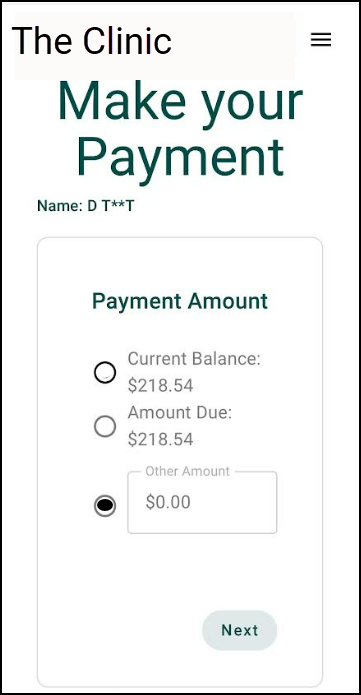
- Mobile Pay Page
Mobile Home Page View Mobile Pay Page View
Log into POPS using a QR Code
The Practice may send a QR code on your Statement or generate one for you to make a payment while in the office.
- Scan the QR code with your cell phone camera.
- This will take you straight to the POPS website.
Make a Payment
After selecting the link or QR code, log into POPS.
- Select the Pay button if you land on the Home Page.
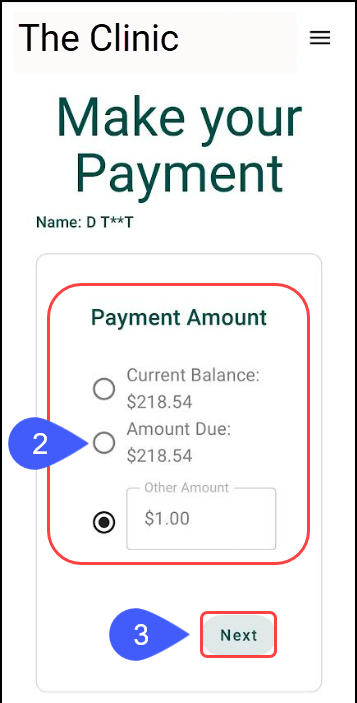
- If you landed on the Make Your Payment page, this step can be skipped.
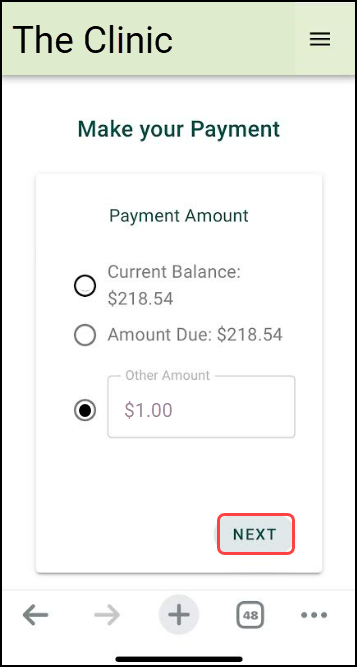
- Select the Payment Amount or manually enter an amount.
- Current Balance: This is the Balance on the last Statement plus Patient balances after the Statement minus any Payments made on the last Statement.
- Amount Due: This is the amount that is due on the last Statement minus any Payments made since the last Statement and before the next Statement.
- Other Amount: Manually enter an Amount.
- Select the Next button.
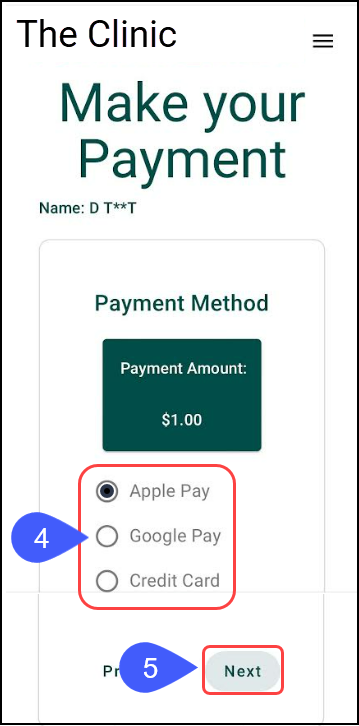
- Select your Payment Method.
- Apple Pay: To use Apple Pay, you must be on an IOS device (MAC or iPhone).
- Google Pay
- Credit Card
- Select the Next button.
Follow the Prompts for the Payment Method chosen.
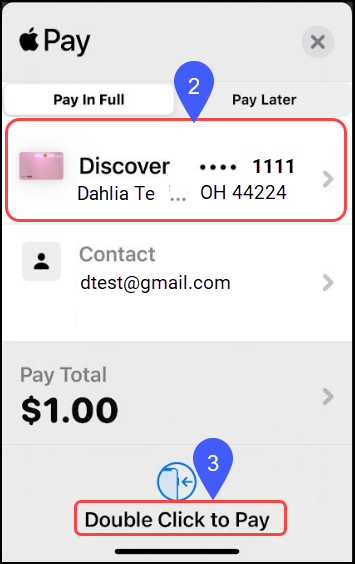
Apple Pay
- Select the Apple Pay button.
- Select the Debit/Credit Card for Apple Pay.
- Double Click side button to Pay.

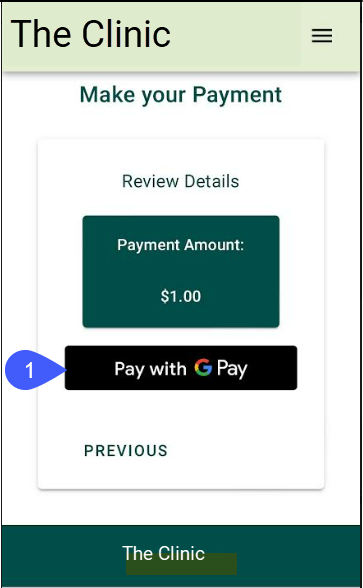
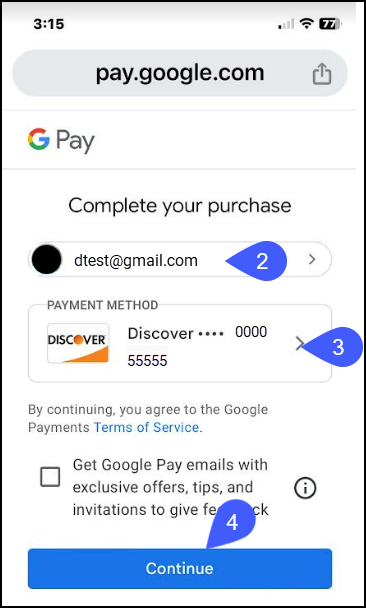
Google Pay
- Select the Google Pay button.
- Select the correct email address.
- Select the correct Payment Method.
- Select the Continue button.
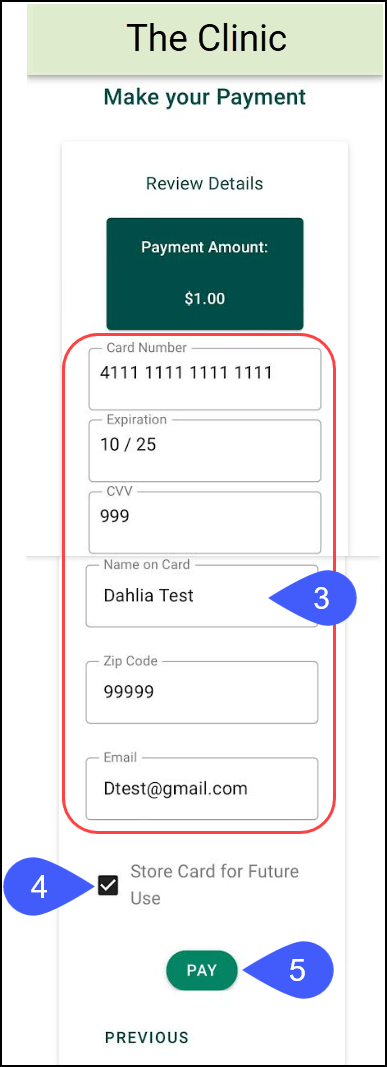
Credit Card Payment
- Select Credit Card for Payment Method.
- Select Next.

- Select an already existing Credit Card.
- OR Enter a New Card
- Enter the Credit Card Information
- Select the Store Card for Future Use checkbox to make the card available in the future.
- Since the Credit Card information is not stored in the System, you cannot edit it.
- After storing the card, only the last 4 digits of the card number are visible.
- If the Expiration Date or CVV has changed, a new Credit Card must be added.
- Only active Credit Cards will be available here.
- Select Pay.
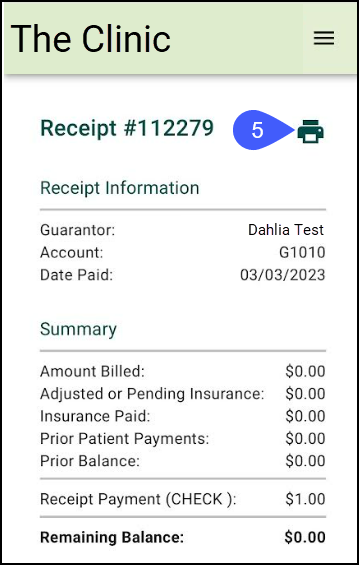
Payment Receipt
- If the Payment was successful, the Guarantor will receive an on-screen Receipt with the ability to Print it.
- If an email address or cell phone number was entered, the Guarantor will receive a Receipt via email or text.
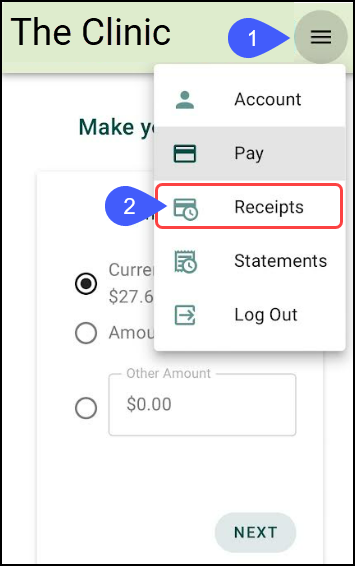
View the Receipt in POPS
- Select the three lines on the upper right.
- Select Receipts.
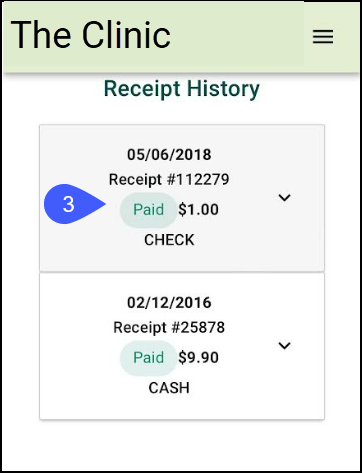
- Select the Receipt to view.
- Select Itemized Receipt.
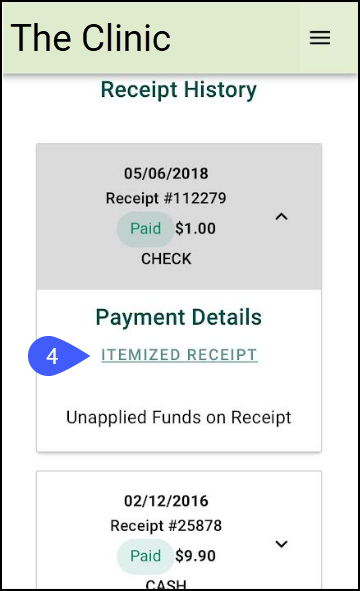
- Select the Printer Icon to print the Receipt.
Payment Failed
If the Payment failed, this screen will display.
Account
View your account in POPS.
Payments
View your previous Payments.
Statements
View your Statement History.
Why can't I make a Payment?
Below are Messages that you may receive in POPS with a reason why you cannot make a Payment.
- No Payment Necessary: You will not be able to make a Payment in POPS if you receive this message.

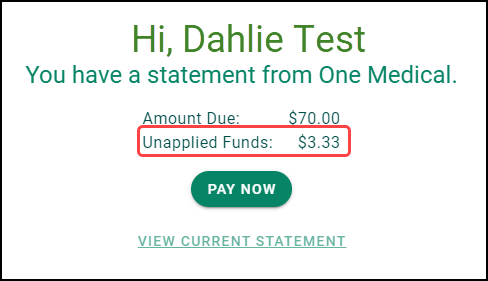
- Unapplied Funds: This is money that you have paid that has not been applied to an Encounter/Visit.
- Your balance is paid: No payments can be made if you do not have a Patient balance.

Related Articles
POPS Appointments
The POPS Appointments screen allows Patients and Guarantors to view their Past and Upcoming Appointments. Guarantors will be able to see the Appointments for all of their Patients or filter for a specific Patient. POPS Appointments Setup In the POPS ...POPS QuickPay
Use QuickPay to make a Patient Payment without the detail of the Full POPS Portal. To mirror the POPS Patient Experience, access QuickPay by using the POPS link in the Balance panel on the Patient Dashboard. QuickPay can be accessed by the Patient ...POPS Collection Balances
Collection balances can be displayed in the POPS Portal. Collection Payments cannot be made through the POPS Portal. Payments can still be made on non-Collections balances when there is a Collection balance. Show Collections must be enabled in the ...POPS Pay/QuickPay
POPS Payments A POPS Payment can be made in the Full Portal or using QuickPay from a link or QR Code. Select Pay or the Pay Now link in the Full Portal to navigate to the Make your Payment screen. In QuickPay, you will land on the Make your Payment ...Premium Add-On Features
If you are interested in the Premium add-on features, create a Manage Services ticket. Following the instructions using this link: MS Manage Services. Balance Notifications Provides scheduled Patient balance notifications. Credit Card Services ...