Dispensed Goods/Product Charges
Dispensed Goods/Product Charges
Add Charge, Copay, and Payment for Dispensed Items
- On the Appointment Screen, select the Enter Charge Link.
- Insurance: Self Pay
- DX1: Misc
- Enter the CPT.
- Modify the Fee if necessary and tab through the fields until the Line Item appears in the window below. Enter next CPT if applicable and follow the steps above.
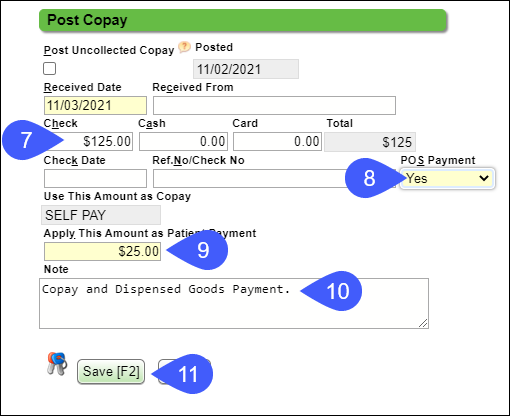
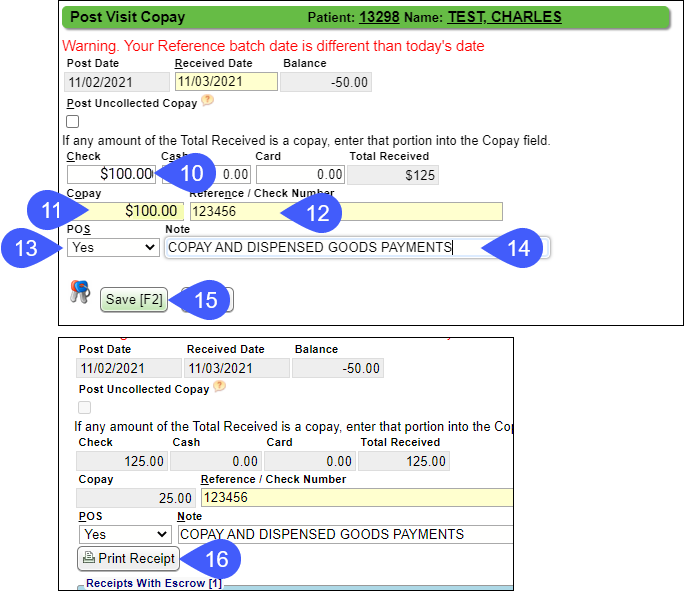
- Select the Copay button.
- Enter the full amount in the Check, Cash, or Credit Card field. (Copay and Dispensed Goods Payment).
- POS: Choose Yes.
- Enter only the Copay amount in the Copay field.
- If there is no Copay collected, enter the same amount that was entered in Check, Cash, or Credit Card field.
- Enter the Details of Payment in the Note field.
- Select Save [F2].
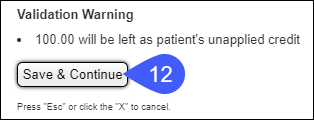
- Validation Warning: Click Save and Continue.
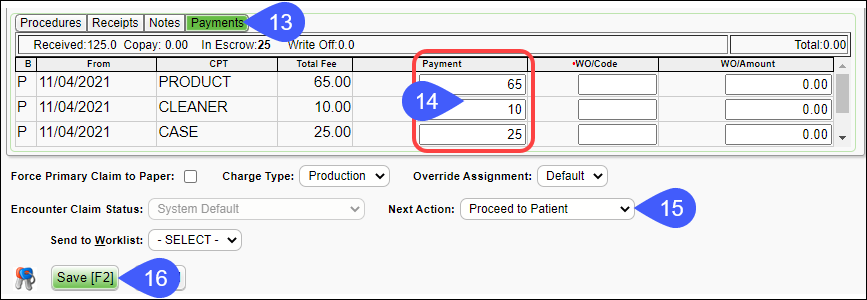
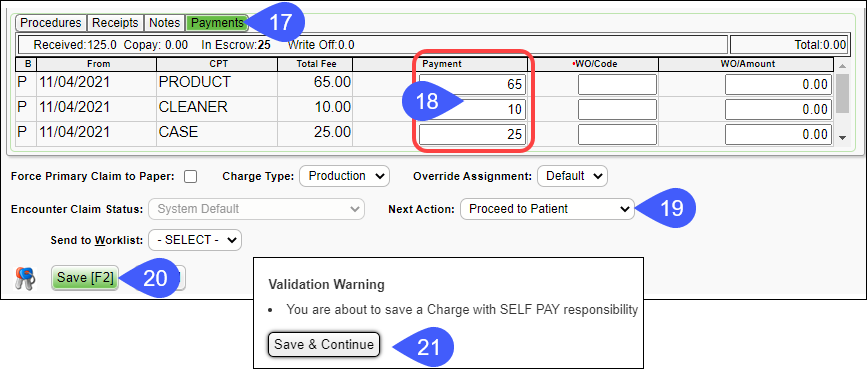
- Select the Payments button.
- Enter the Payments on each Line Item. (The Copay amount will not post because because there are no Insurance Line Items.)
- Next Action: Select Proceed to Patient.
- Select Save [F2].
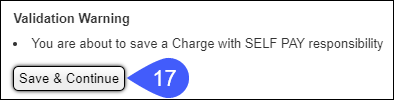
- Validation Warning: Click Save & Continue.
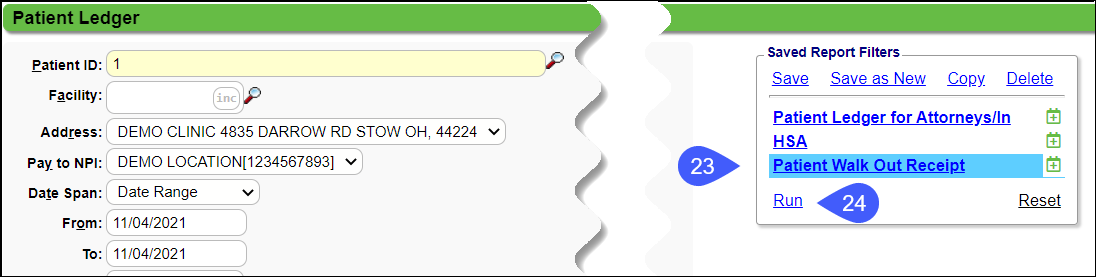
- On the Patient Dashboard, select Patient Ledger. (Patient Ledger for Walk-out Receipt should already be Saved. See Setup below.)
- In Saved Report Filters, choose the Patient Walk-out Receipt.
- Select Run [F2].

- Print the Patient Ledger.
Add Charge and Payment for Dispensed Items without an Appointment
- On the Patient Dashboard, select Post Charge.
- Insurance: Choose Self Pay.
- Facility: Choose Facility.
- Rendering: Choose the Rendering Provider.
- DX1: Misc
- Enter Date of Service.
- Enter the CPT.
- Modify the Fee if necessary and tab through the fields until the Line Item appears in the window below. Enter next CPT if applicable and follow the steps above.
- Select the Copay button.
- Enter the full amount in the Check, Cash, or Credit Card field. (Copay and Dispensed Goods Payment).
- Enter the same amount in the Copay field that was entered in the Check, Cash, or Credit Card field.
- Enter the Reference/Check Info.
- POS: Choose Yes.
- Enter the Details of Payment in the Note field.
- Select Save [F2].
- Validation Warning: Click Save and Continue.

- Select the Payments button.
- Enter the Payments on each Line Item. (The Copay amount will not post because because there are no Insurance Line Items.)
- Next Action: Select Proceed to Patient.
- Click Save [F2].
- Validation Warning: Click Save & Continue.
- On the Patient Dashboard, select Patient Ledger. (Patient Ledger for Walk-out Receipt should already be Saved. See Setup below.)
- In Saved Report Filters, choose the Patient Walk-out Receipt.
- Select Run [F2].
- Print the Patient Ledger.
Patient Ledger Setup for Walk-out Receipt
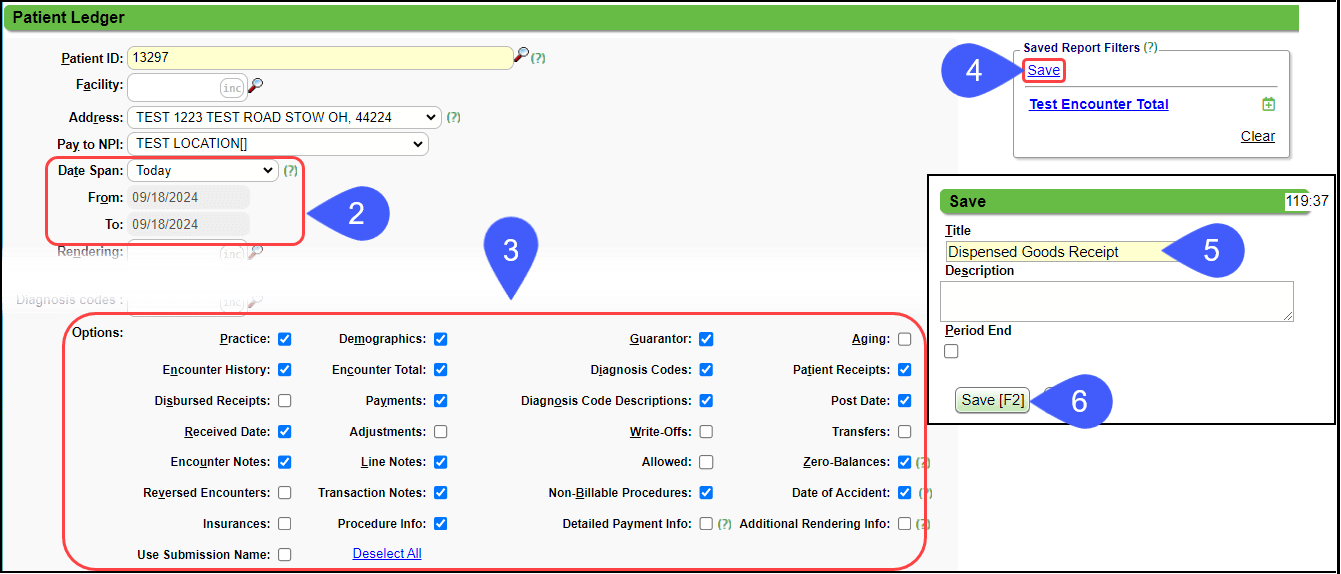
- On the Patient Dashboard, select Patient Ledger.
- Date Span: Select Today.
- Select the Options to display on the Walk-out Receipt.
- Click Save as New in the Saved Report Filters panel.
- Enter the Name of the Walk-out Receipt.
- Click Save [F2].
Related Articles
Modify a Contact
Modify a Contact Make Changes to the Patient Contact The Patient Contact can be added from the Patient Registration screen but can only be modified from the Patient Dashboard screen. On the Patient Dashboard, select Contacts. If this is a new ...
Add a Contact from the Patient Dashboard
On the Patient Dashboard in the Demographic panel, select the Contacts link. Select the Add button. Any changes made on the Modify Contact screen will change the Person's Demographic Record as well. Patient Relationship to Contact: Choose the ...
Add/Modify/Remove a Case Contact
Once the Case is saved, you can Add/Modify Contacts on the Case Dashboard. Add Contacts to a Case From the Patient Dashboard, select the Cases link. From the Cases screen, Select the Case ID. In the Contact panel, select the Add button. Contact ...
Daily Charges Report
The Daily Charges Report is a detailed breakdown of each Patient's Charges for a day or a date range. This report can be run at the end of the day to capture your Charges, or it can be run for a different period to report Charges and Payments for the ...
Add a Contact/Emergency Contact Overview
Users can create Contacts at the time of Patient Registration or from the Patient Dashboard. You can only edit Contacts from the Patient Dashboard. Add the System Setting for the Contact Panel to Display on the Registration Screen To add a Contact ...