Appointment Mapping for Conversions
Appointment Mapping For Conversions
This only applies if you are importing Appointments from your old PM.
Tools needed
- Appointment Mapping Spreadsheet
- Your new PM Schedule Setup
To import Appointments from your legacy PM to your new PM correctly, it is necessary to map Appointment Type IDs from the previous system to the equivalent Appointment Type in the new PM. If there are Appointments from multiple locations or facilities and multiple resources exist, these will need to be mapped as well.
For instance, in your legacy PM, a New Patient Appointment may have an ID of "NewPT" and in your new PM, the ID is "NP". You would map "NewPT" = "NP".
Steps
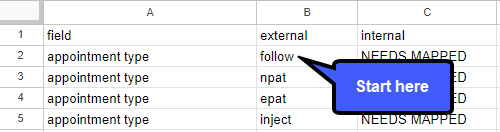
- Open the Appointment Mapping Spreadsheet. Start on the first row, second column(B) and locate the Appointment Type ID.
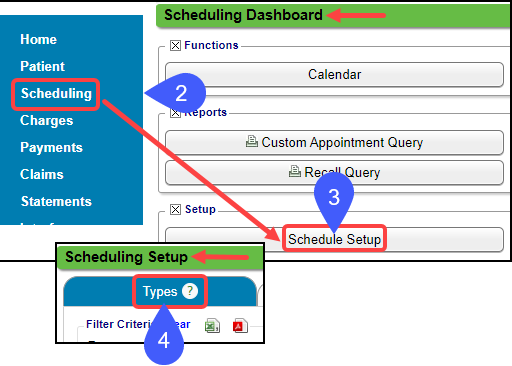
Open your new PM System.
- From the left sidebar menu, select Scheduling.
- Select Schedule Setup.
- Choose the Types tab.
- Locate the Appointment Type ID. For example, locate the matching Appointment Type in the Schedule Setup. The ID column is labeled Type.
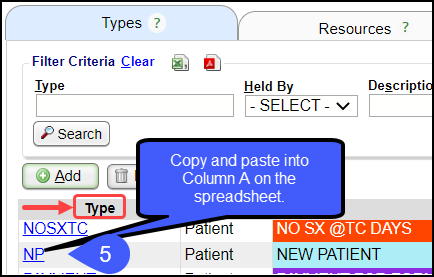
- Copy the PM System Appointment Type ID into the first column (A) of the Appointment type mapping Spreadsheet.
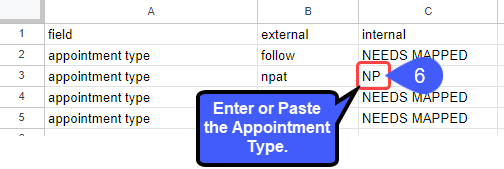
- Repeat the steps for each row in the Appointment type Mapping Spreadsheet.
- When complete, attach the completed file to Training Ticket, or as otherwise directed.
Multiple Appointment Types can be mapped to one Appointment Type by entering the same Appointment Type ID in multiple rows of the Appointment Type Mapping Spreadsheet.
 Appointments for any Appointment Types that are unmapped will not be imported.
Multiple Scheduling Facilities and Resources
If appointments from multiple locations or facilities and multiple resources exist, it is necessary to map these.
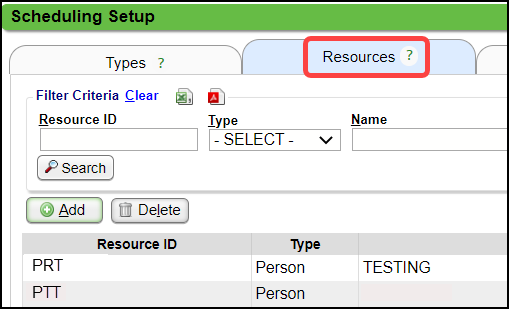
If these values are required, they will be included on the same mapping spreadsheet as the Appointment Type IDs. Appointment Resources are located in the Schedule Setup under the Resources tab.

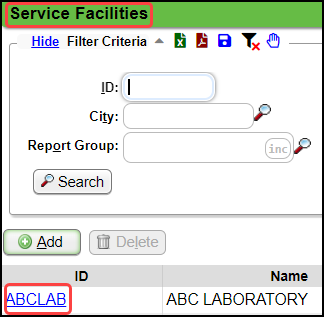
To access Service Facilities choose Libraries on the left sidebar menu and select Service Facilities. Only include facilities where you plan to schedule appointments.
Related Articles
Insurance Mapping for Conversion
In order to import Insurance Policies from an old PM correctly, it is necessary to map Insurance IDs from the previous System to the equivalent in the new PM. Tools needed: Insurance Mapping CSV file (spreadsheet) PM Insurance Library Map the ...Delete a Mapping
If a Mapping is no longer needed, it can be deleted. Be careful when deleting a mapping, and do not delete unless you are sure. Delete a Mapping From Interface on the Left Side Menu, select the Incoming Mapping button. Choose the Interface from the ...Change an Interface Mapping
Change an Existing Interface Mapping If an existing Mapping is changed, it does not change existing Encounters/Records. Changes will be reflected in the new Charges only. Interface on the Left Side Menu > Incoming Mappings Choose your Interface. ...Appointment Shells
Appointment Shells are a Calendar option that opens a view of the types of Appointment Slots that are available. The User can Add/Modify/View Concurrent Appointments and identify the number of Appointments and duration. The Appointment Shells reflect ...Patient's Last Appointment Date
The Patient's Last Appointment can be seen in several places in the System. When scheduling an Appointment: On the right side of the Add Appointment screen, the Previous and Next Appointments can be seen. On the Patient Dashboard in the Patient ...